What are Structured Outputs?
Structured outputs define formats LLMs must follow when generating responses:- Consistent response formats
- Easier parsing and validation
- More reliable integration with your applications
- Less error handling
Creating Structured Outputs with JSON Schema
To add a JSON schema to your prompt template:- Edit your prompt template
- Click “Functions & Output”
- Select “Structured Output”
- Click “Add Schema”
- Define your schema structure
Example: Customer Review Analysis Schema
Schema Configuration Options
Strict Mode
Strict mode enforces more rigorous schema validation. When enabled, the LLM output must exactly match the schema specification with no additional fields or deviations. In the schema editor:- Toggle “Strict Mode” in the schema settings
- Ensure your schema is complete and accurate
- Test with sample inputs
Additional Properties
Control whether objects can have properties not defined in your schema:- Disabled (default): Only properties you define are allowed
- Enabled: Objects can include additional properties beyond those specified
String Validation
Add constraints to string fields to ensure proper formatting. The schema editor provides an intuitive interface for configuring these constraints: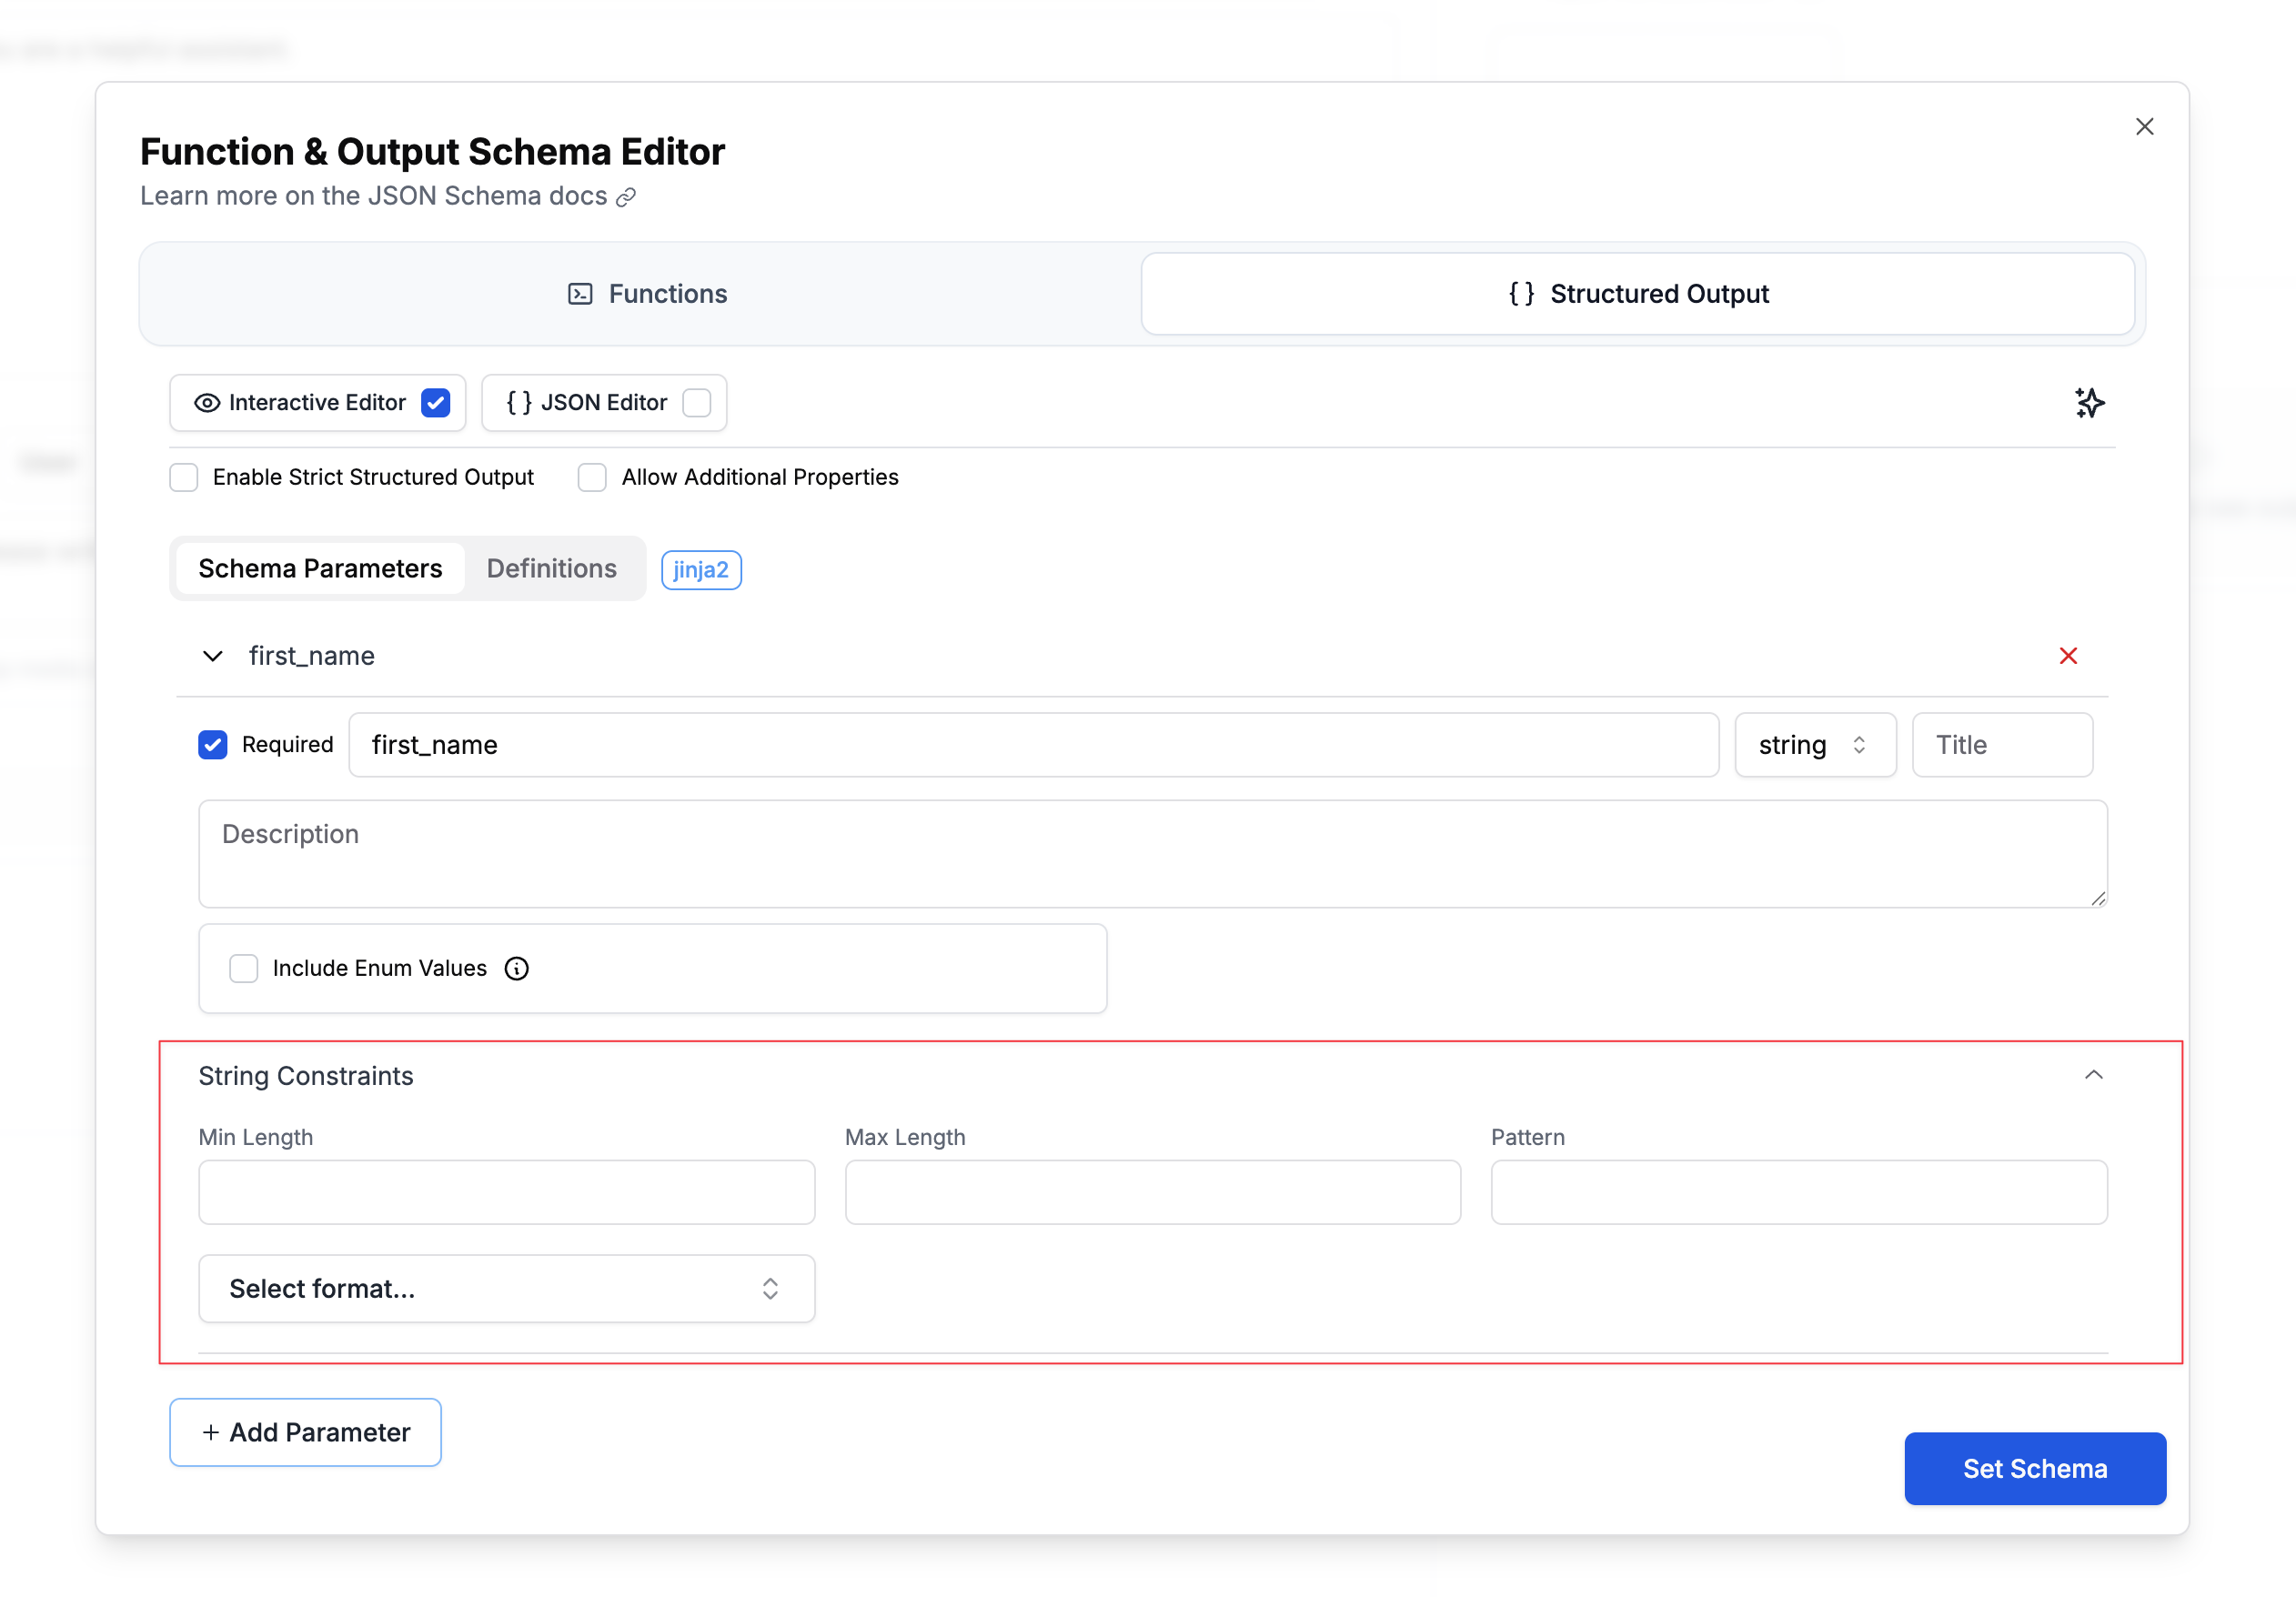
Length Constraints
Control the minimum and maximum length of strings using the Min Length and Max Length fields. For example, you might require a username to be between 3-20 characters, or limit a bio field to 500 characters maximum.Pattern Matching
Use regex patterns to validate string formats. Enter your regular expression in the Pattern field to enforce specific formats like alphanumeric usernames with underscores (^[a-zA-Z0-9_]+$) or valid phone numbers (^\+?[1-9]\d{1,14}$).
Format Validation
Specify standard formats for automatic validation using the Select format… dropdown. This provides built-in validation for common data types like email addresses, URLs, dates, and UUIDs without requiring custom regex patterns. Supported formats:date-time- ISO 8601 datetime (e.g., “2024-01-15T10:30:00Z”)date- Full date (e.g., “2024-01-15”)time- Time (e.g., “10:30:00”)duration- ISO 8601 durationemail- Email addressidn-email- Internationalized email addresshostname- Valid hostnameidn-hostname- Internationalized hostnameipv4- IPv4 addressipv6- IPv6 addressuri- URI/URLuri-reference- URI referenceiri- Internationalized URIiri-reference- Internationalized URI referenceuuid- UUID formaturi-template- URI templatejson-pointer- JSON pointerrelative-json-pointer- Relative JSON pointerregex- Regular expression
Number Validation
Add constraints to number fields to ensure proper validation. The schema editor provides an intuitive interface for configuring these constraints: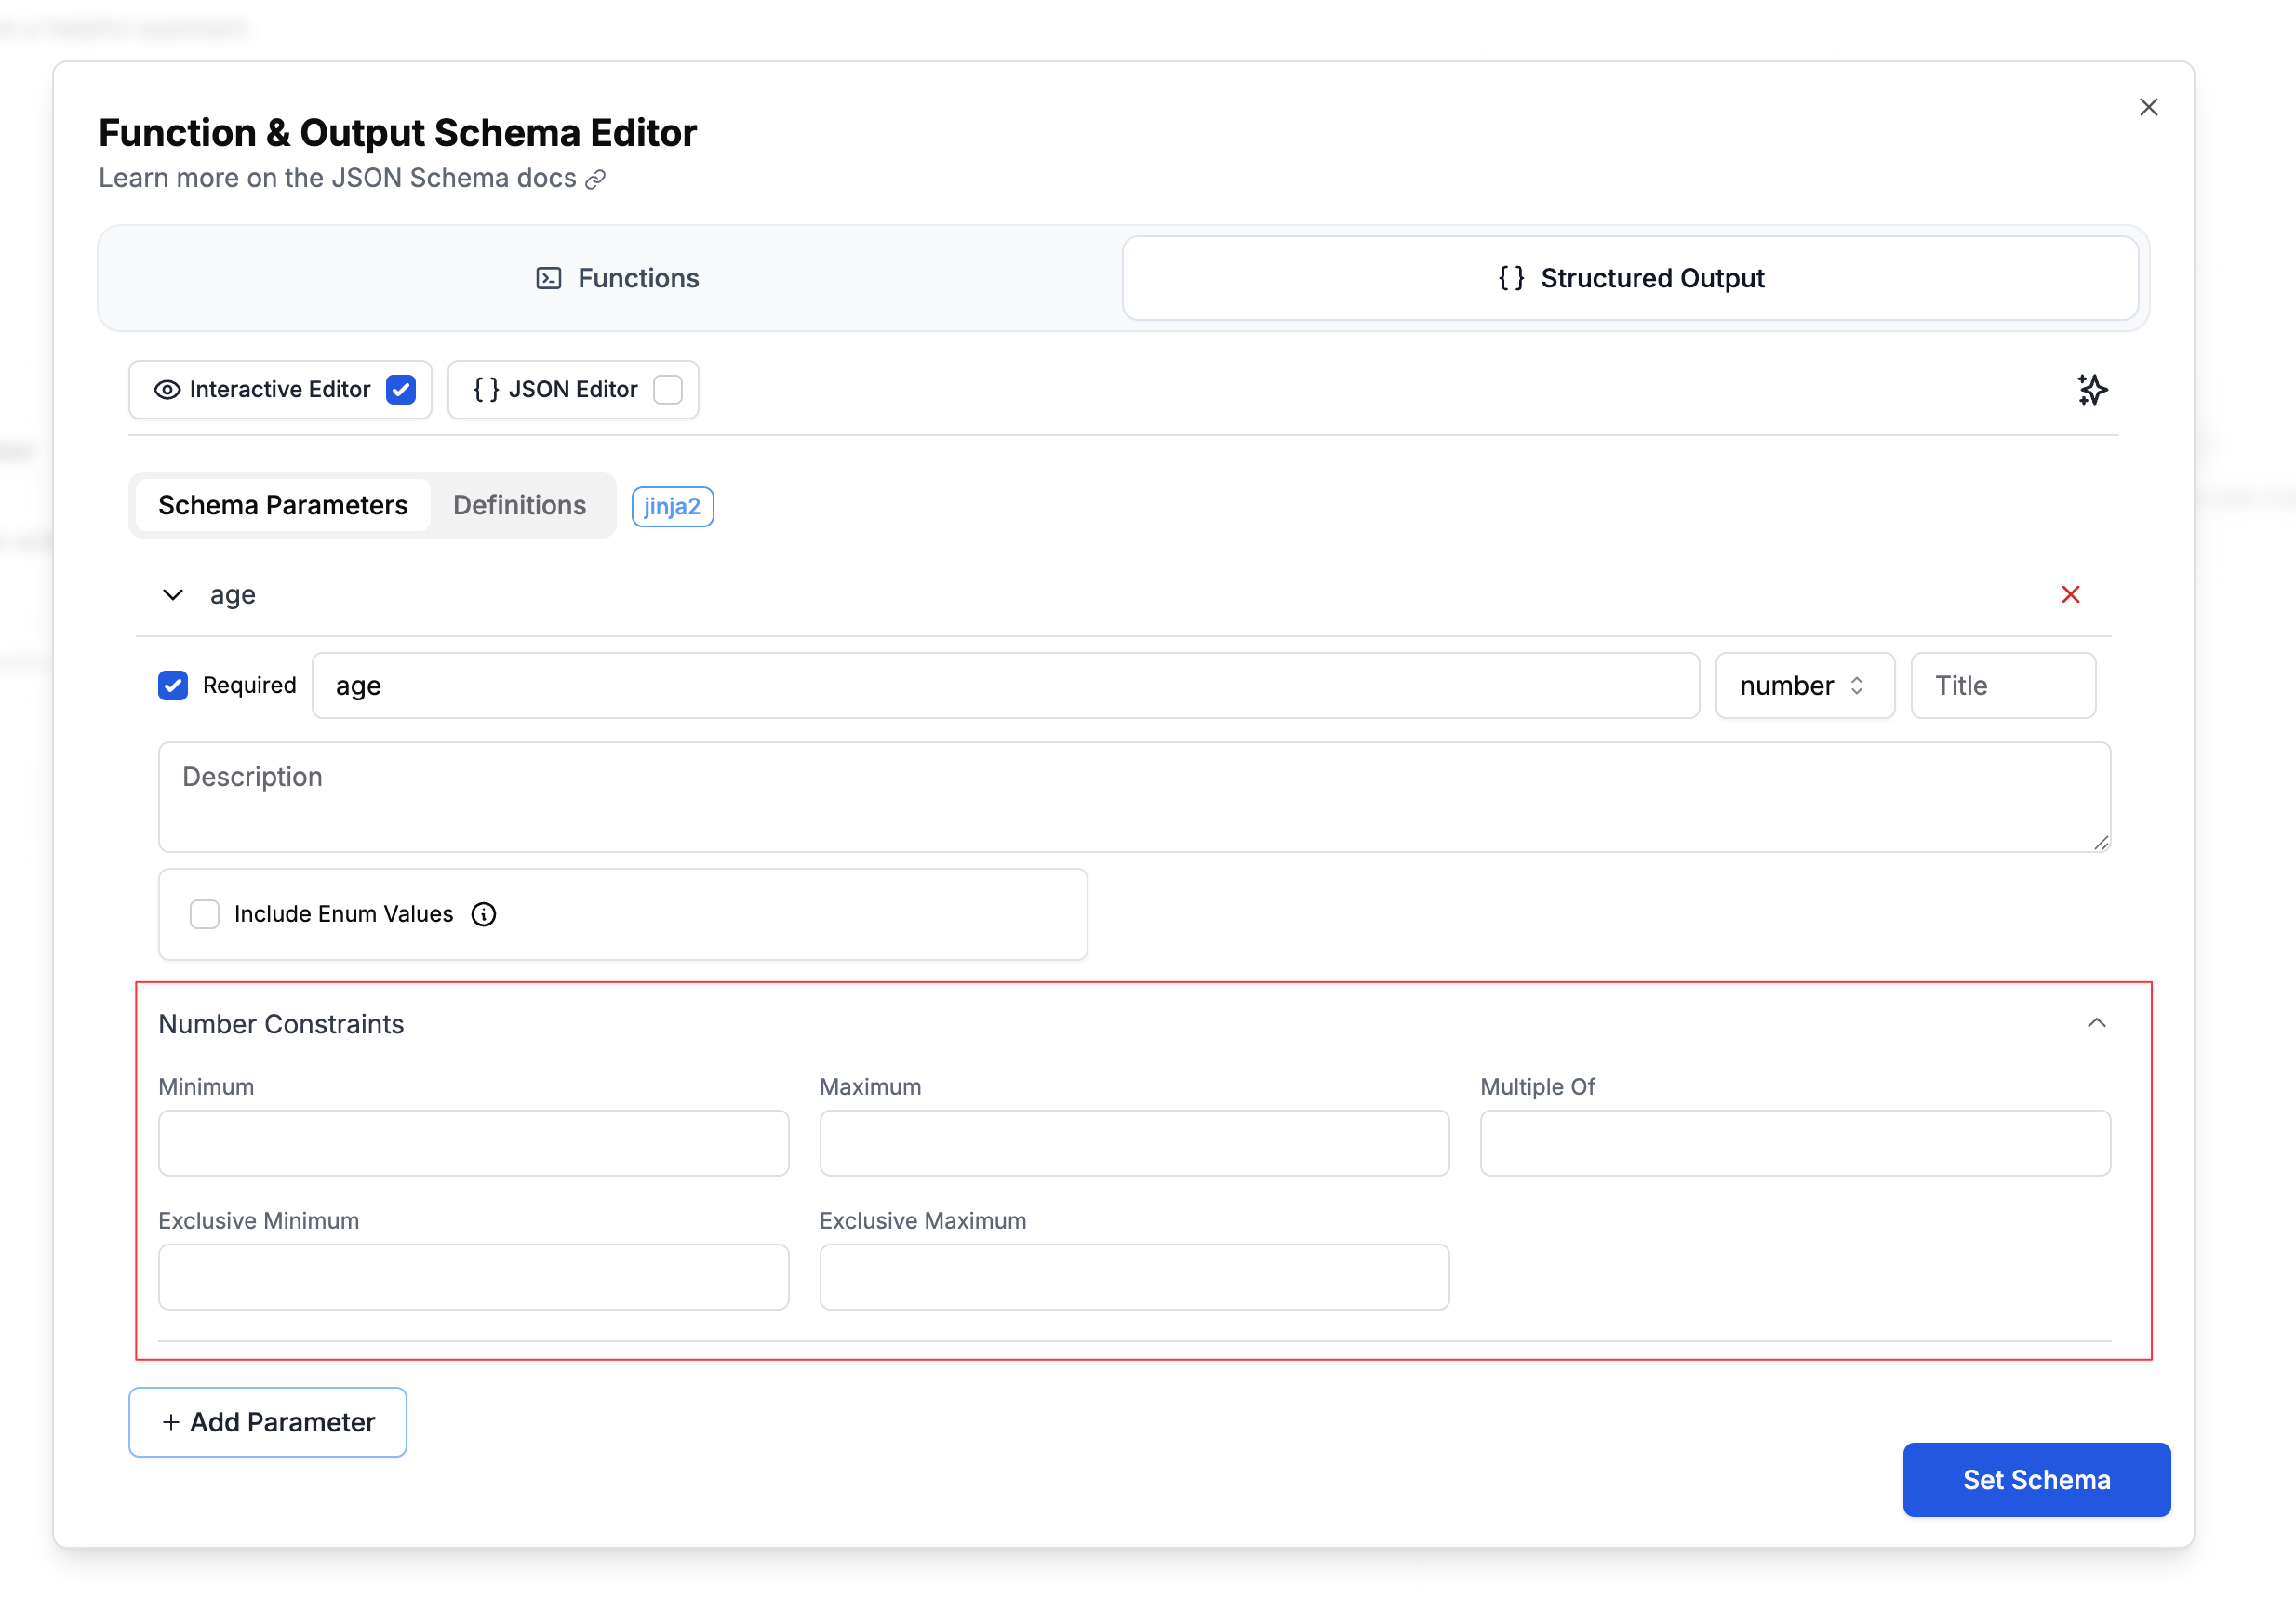
Range Constraints
Control the minimum and maximum values using the Minimum and Maximum fields. For example, you might require an age to be between 0-150, or limit a rating to 1-5 stars.Exclusive Boundaries
Use Exclusive Minimum and Exclusive Maximum checkboxes when you need strict inequalities. For instance, a price field might need to be greater than 0 (not equal to 0), requiring an exclusive minimum.Multiple Of
Specify that numbers must be multiples of a particular value using the Multiple Of field. This is useful for ensuring prices are rounded to cents (0.01), requiring even numbers (2), or enforcing other step values. Example use cases:- Age between 0-150 (inclusive)
- Price greater than 0, rounded to cents (exclusive minimum: 0, multipleOf: 0.01)
- Rating from 1-5 stars (inclusive range)
Array Validation
Control array size and structure.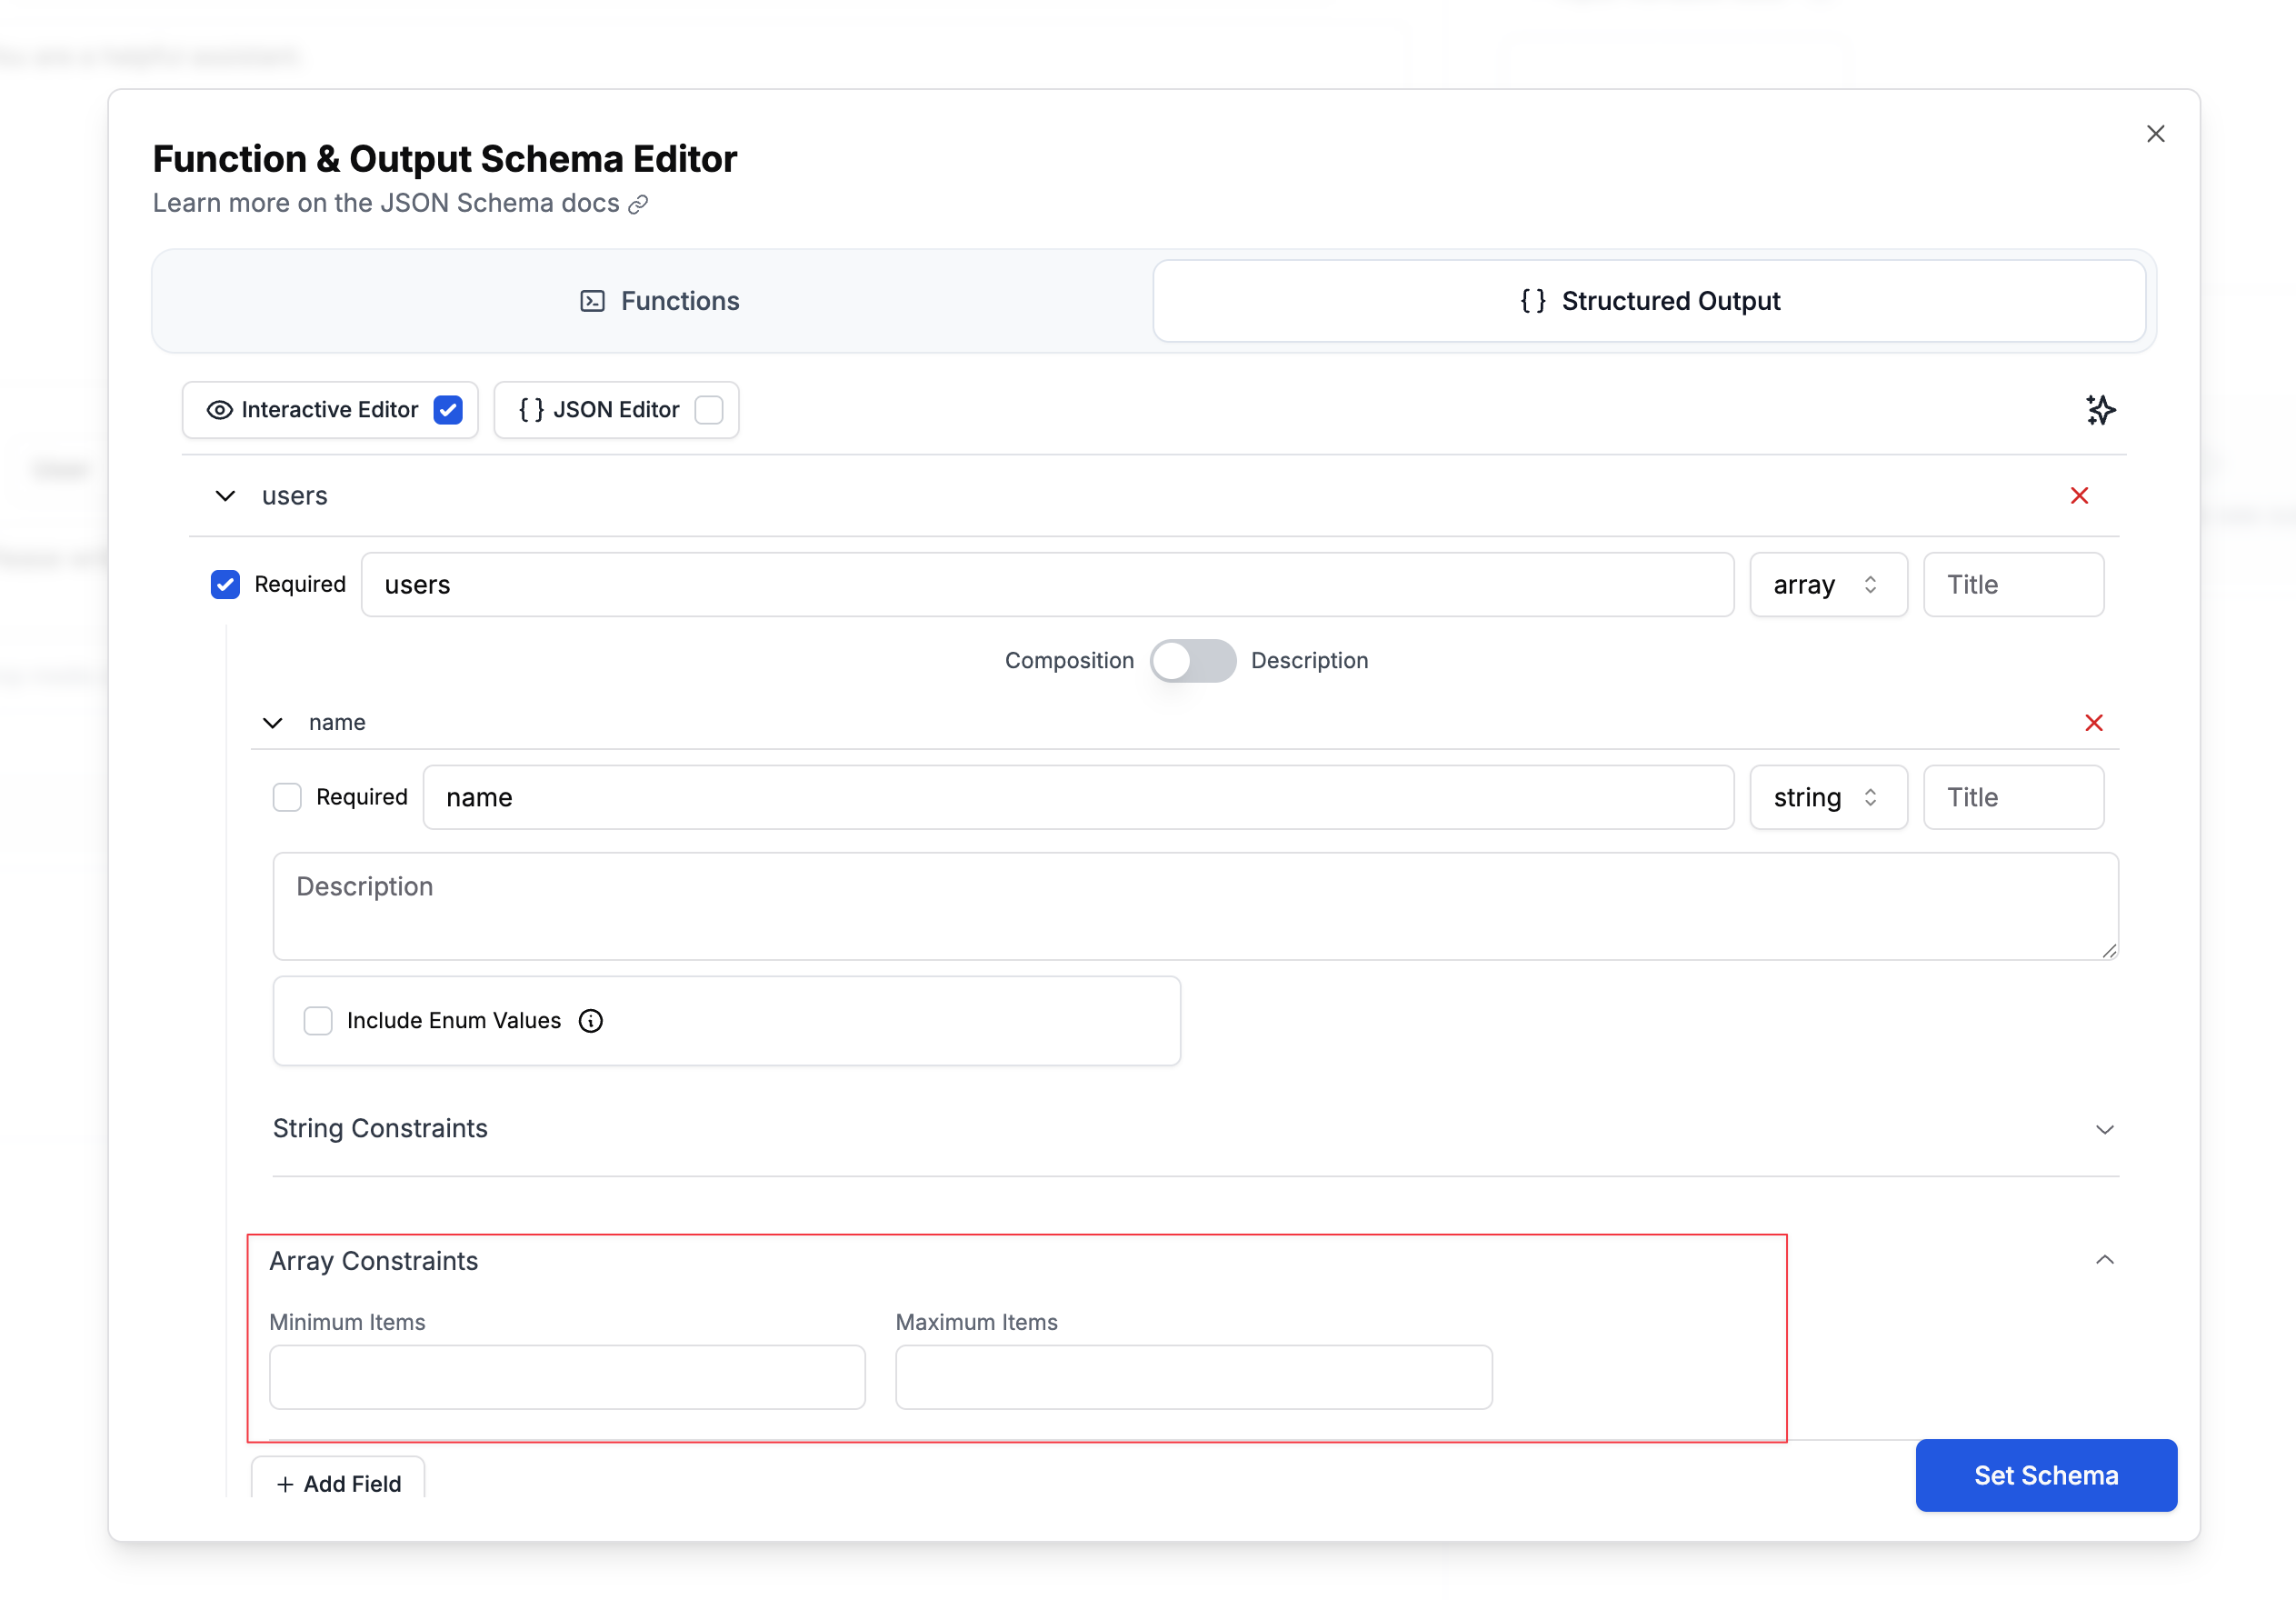
Size Constraints
Control the minimum and maximum number of items in an array using the Minimum Items and Maximum Items fields. For example, you might require at least 1 tag but no more than 10, or limit search results to a maximum of 5 items. Example use cases:- Tags array with 1-10 items
- Top 5 search results (maximum only)
- At least 3 required reviewers (minimum only)
Nested Objects and Required Fields
Using Composition mode you can define complex structures with nested objects and specify which fields are required at each level: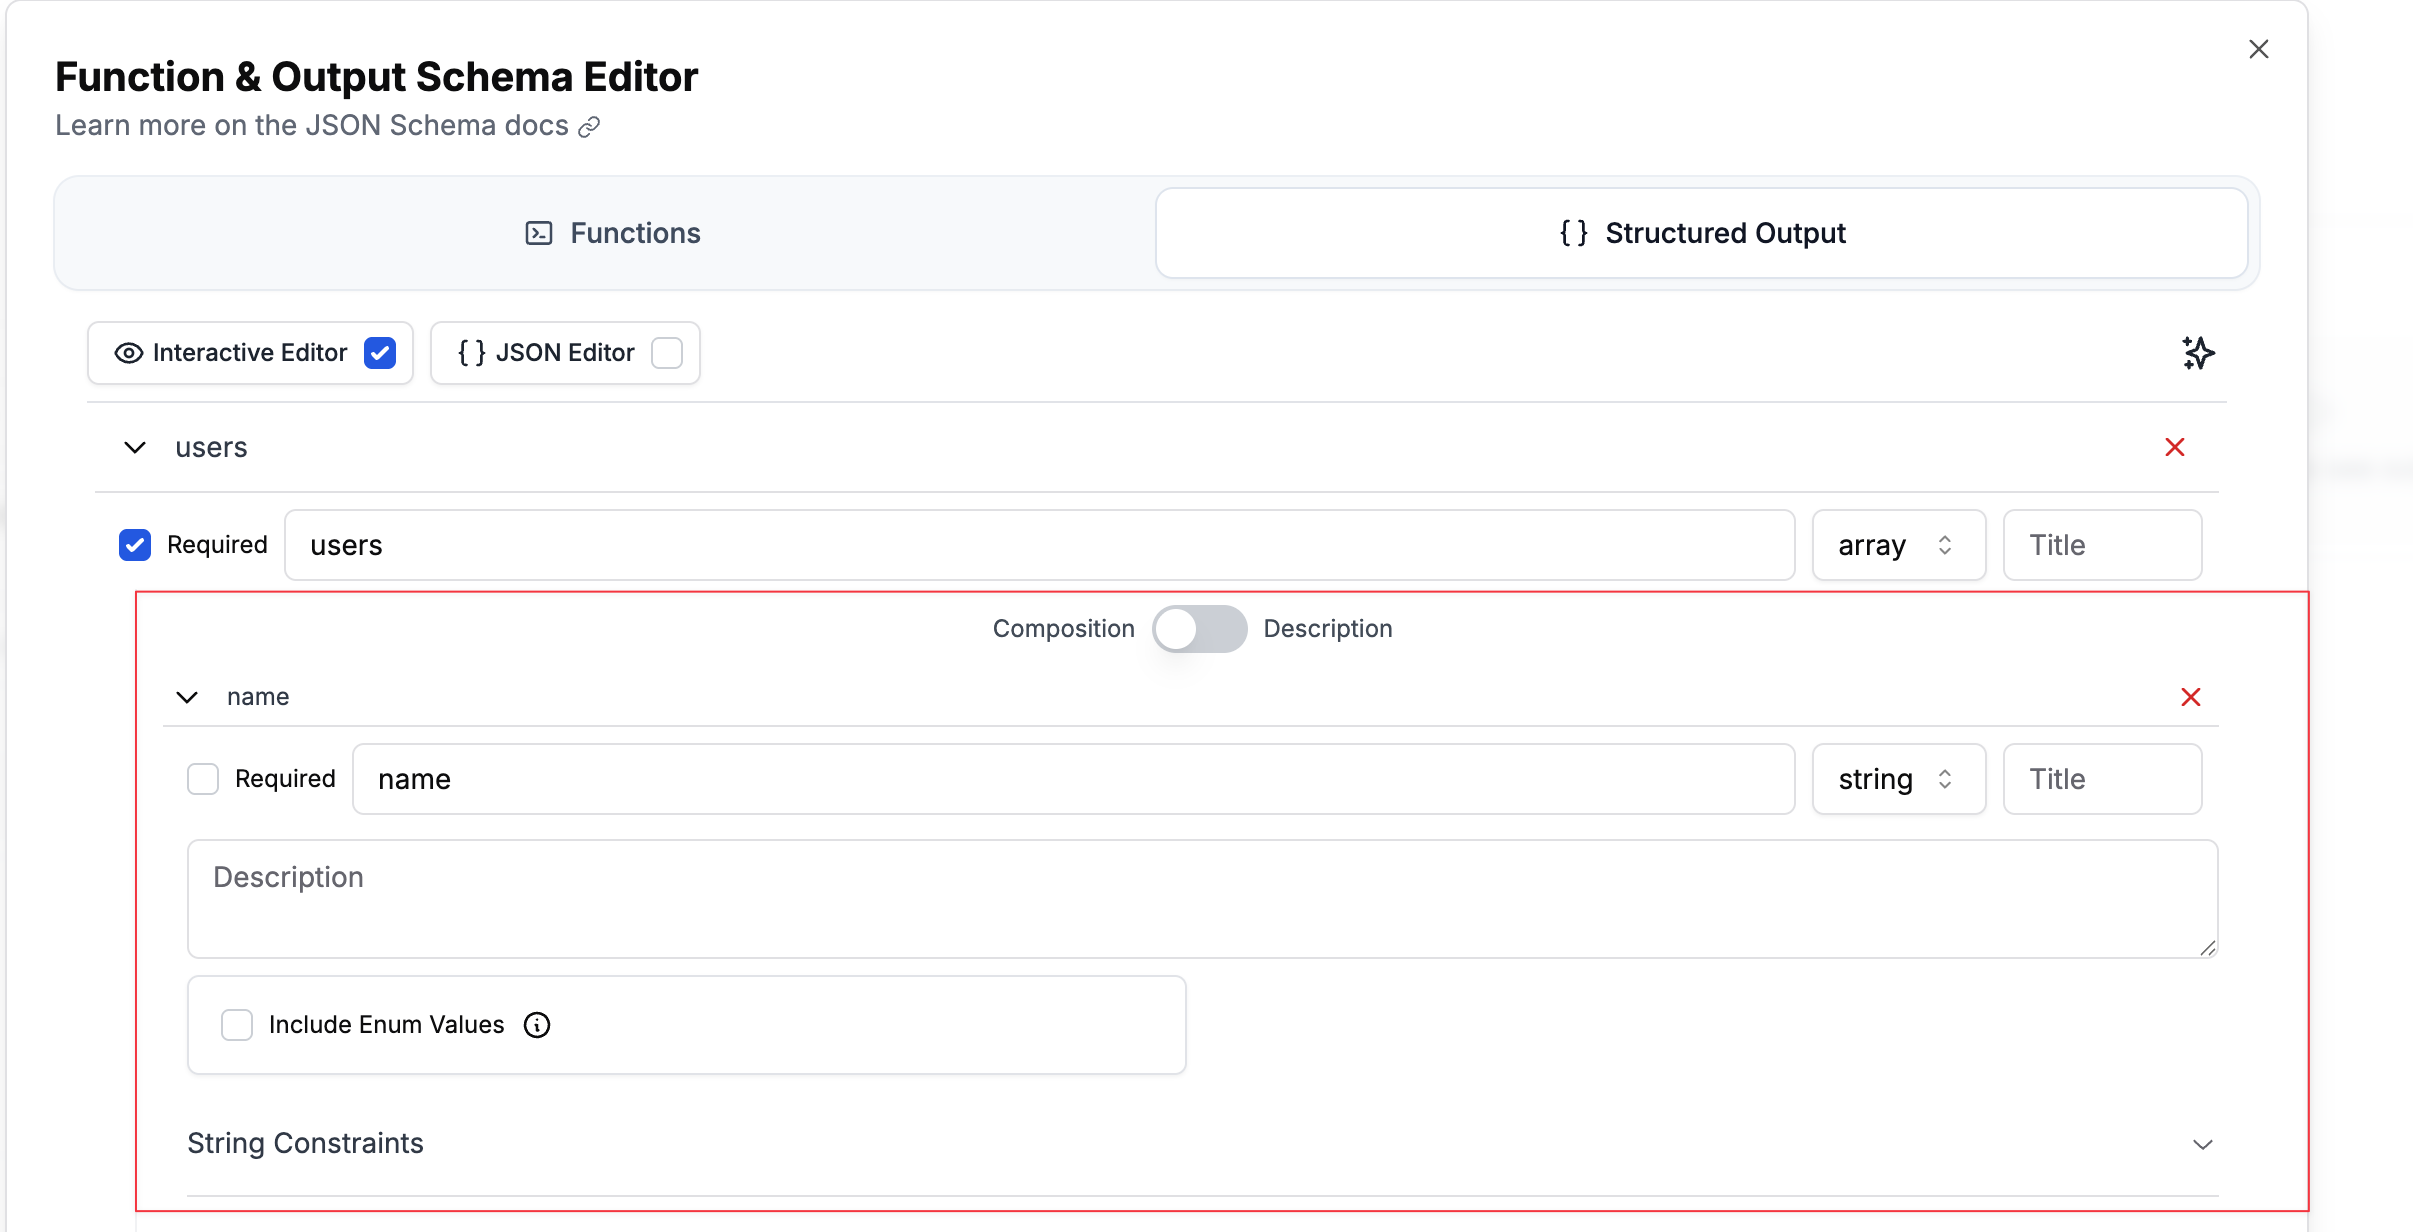
- Create your parent object
- Add nested properties
- Toggle “Required” for each field at its level
- Nest objects as deeply as needed using the “Add Field” button
Reusable Schema Definitions with $defs
For complex schemas with repeated structures, use$defs to define reusable components:

Using $defs in the Interactive Editor
- Click “Add Definition” at the bottom of the schema editor
- Name your definition (e.g., “Person”, “Address”)
- Define its structure like any other object
- Reference it using the Select $ref dropdown:
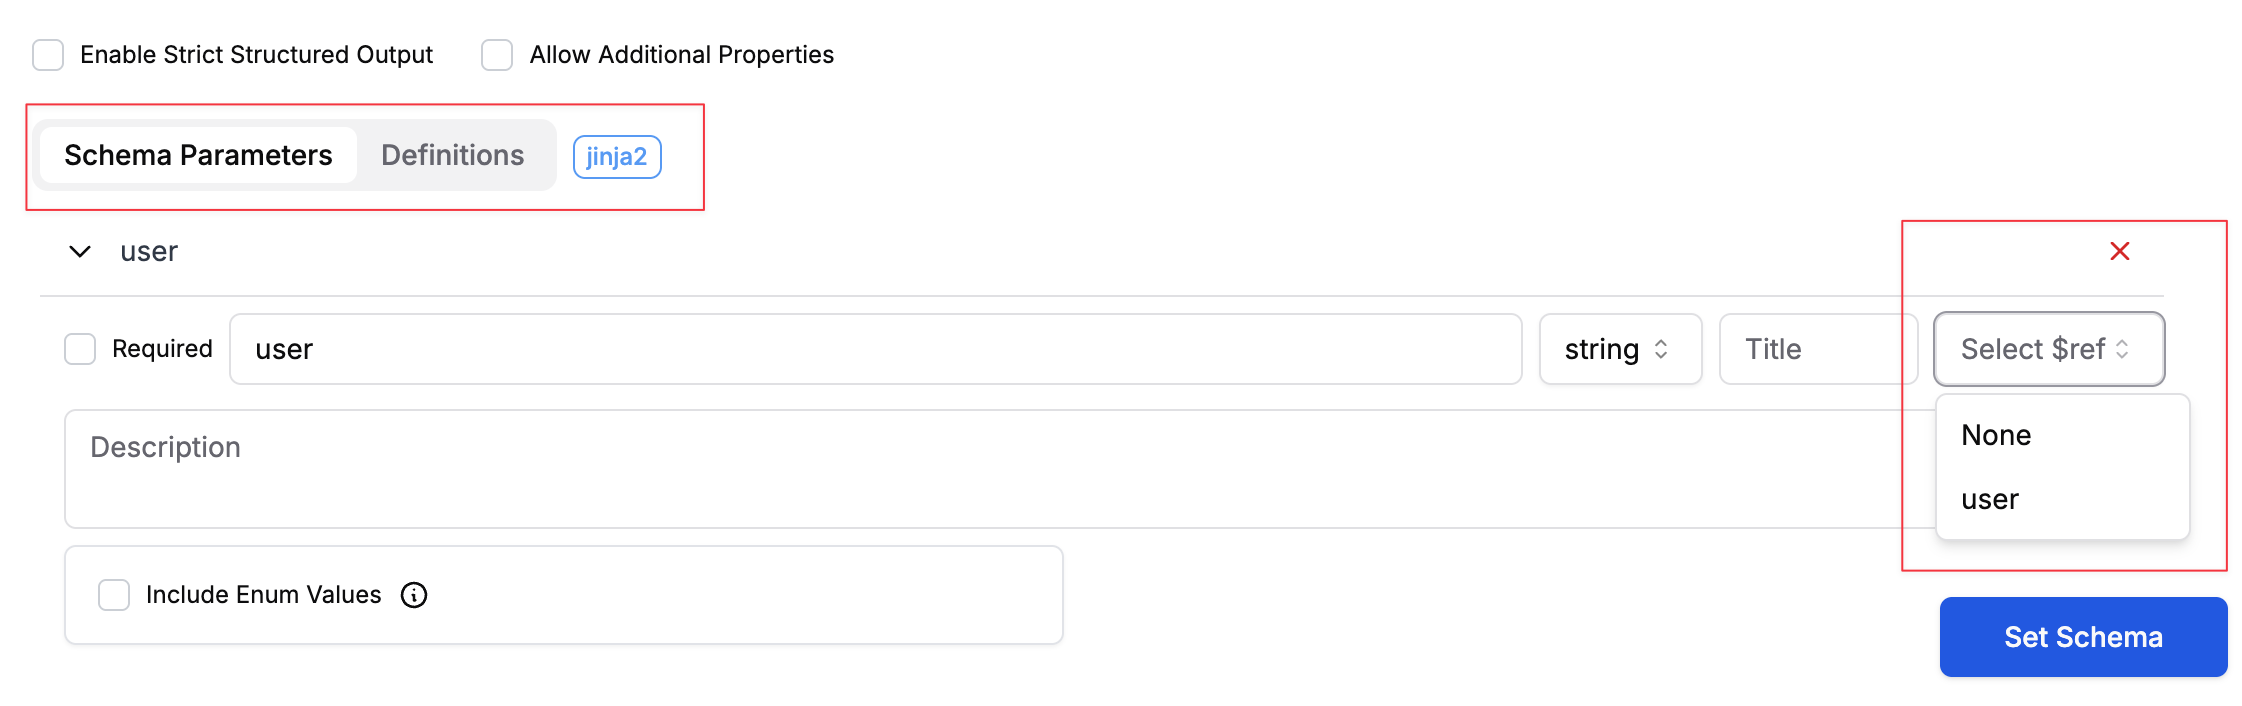
- Avoid duplicating complex structures
- Maintain consistency across your schema
- Easier to update common patterns
Using Variables in Structured Outputs
You can make your schemas dynamic by using template variables:Variables in structured outputs only work with Jinja2 format with the Jinja2 option enabled. F-string format isn’t supported.
Interactive Mode
When using the interactive schema editor, you can add variables in two ways:- For enum values: Click the enum field and toggle the switch to “Use Variable”
- For text/string values: Type
{{ variable_name }}directly in any text field
JSON Mode
Variables must be in quotes, except for enum variables:Variable Use Cases
Dynamic validation constraints:Dynamic Schema Injection with Variable Type
For advanced use cases, you can inject entire schema sections dynamically at runtime using thevariable type. This allows you to define different schemas based on runtime conditions without creating multiple prompt templates.
How It Works
- In the schema editor, select “variable” as the type for a field
- Specify a variable name (e.g.,
userSchema) - At runtime, pass the complete schema object for that variable
Example: Dynamic User Schema
In your prompt template schema:user_data field will be replaced entirely with the schema you provide, allowing different structures for different use cases.
Use Cases for Dynamic Schemas
Multi-tenant applications:Important Notes
- Variable schemas only work with Jinja2 template format
- The entire field is replaced with the provided schema object
- Ensure the injected schema is valid JSON schema syntax
- The injected schema inherits the
additionalPropertiessetting from the parent
Best Practices
- For enum values: Use
{name: "variable_name", type: "enum_variable"}in JSON mode or the variable selector in interactive mode - For text variables: Include them within quotes as
{{ variable_name }}in both modes - For dynamic schemas: Use
type: "variable"with a descriptive variable name - Only Jinja2 format works for variables in structured outputs
- Ensure all variables used in the schema are provided
- Use proper JSON formatting with variables