This is a prompt by {author_name}). Learn more about using template variables. Prompt templates can have tags and are uniquely named.
You can use this tool to programmatically retrieve and publish prompts (even at runtime!). That is, this registry makes it easy to start A/B testing your prompts. Viewed as a “Prompt Management System”, this registry allows your org to pull out and organize the prompts that are currently dispersed throughout your codebase.
Collaboration
The Prompt Registry is perfect for engineering teams looking to organize & track their many prompt templates. … but the real power of the registry is collaboration. Engineering teams waste cycles deploying prompts and content teams are often blocked waiting on these deploys. By programmatically pulling down prompt templates at runtime, product and content teams can visually update & deploy prompt templates without waiting on eng deploys. We know quick feedback loops are important, but the Prompt Registry also makes those annoying last-minute prompt updates easy.Comments
The Prompt Registry supports threaded comments on prompt versions, enabling collaborative discussions about edits and ideas. This feature facilitates communication between team members, allowing them to share feedback, suggest improvements, and document the reasoning behind prompt changes. By fostering collaboration through comments, teams can make more informed decisions and maintain a clear history of prompt evolution.Getting a Template
The Prompt Registry is designed to be used at runtime to pull the latest prompt template for your request. It’s simple.POST /prompt-templates/{prompt_name}to get a template with input variables and provider-formatted output (read more)GET /prompt-templates/{prompt_name}to get raw template data without applying input variables, useful for syncing, caching, or inspection (read more)
By Release Label
Release labels likeprod and staging can be optionally applied to template versions and used to retrieve the template.
By Version
You can also optionally passversion to get an older version of a prompt. By default the newest version of a prompt is returned
Metadata
When fetching a prompt template, you can view yourmetadata using the following code snippet:
Formatting
PromptLayer can format and convert your prompt to the correct LLM format. You can do this by passing the argumentsprovider and input_variables.
Currently we support provider type of either openai or anthropic.
Setting Execution Parameters
When using PromptLayer, ensure you set any necessary parameters for execution, such asprovider, input_variables, and other specific parameters required by the LLM provider (e.g., temperature, max_tokens for OpenAI). Use the llm_kwargs as provided. If you need to override certain arguments, it is recommended to create a new version on PromptLayer. Alternatively, you can override them on your end if necessary.
Publishing a Template
You can use the UI or API to create a template. Templates are unique by name, which means that publishing a template with the same name will overwrite old templates.String Formats
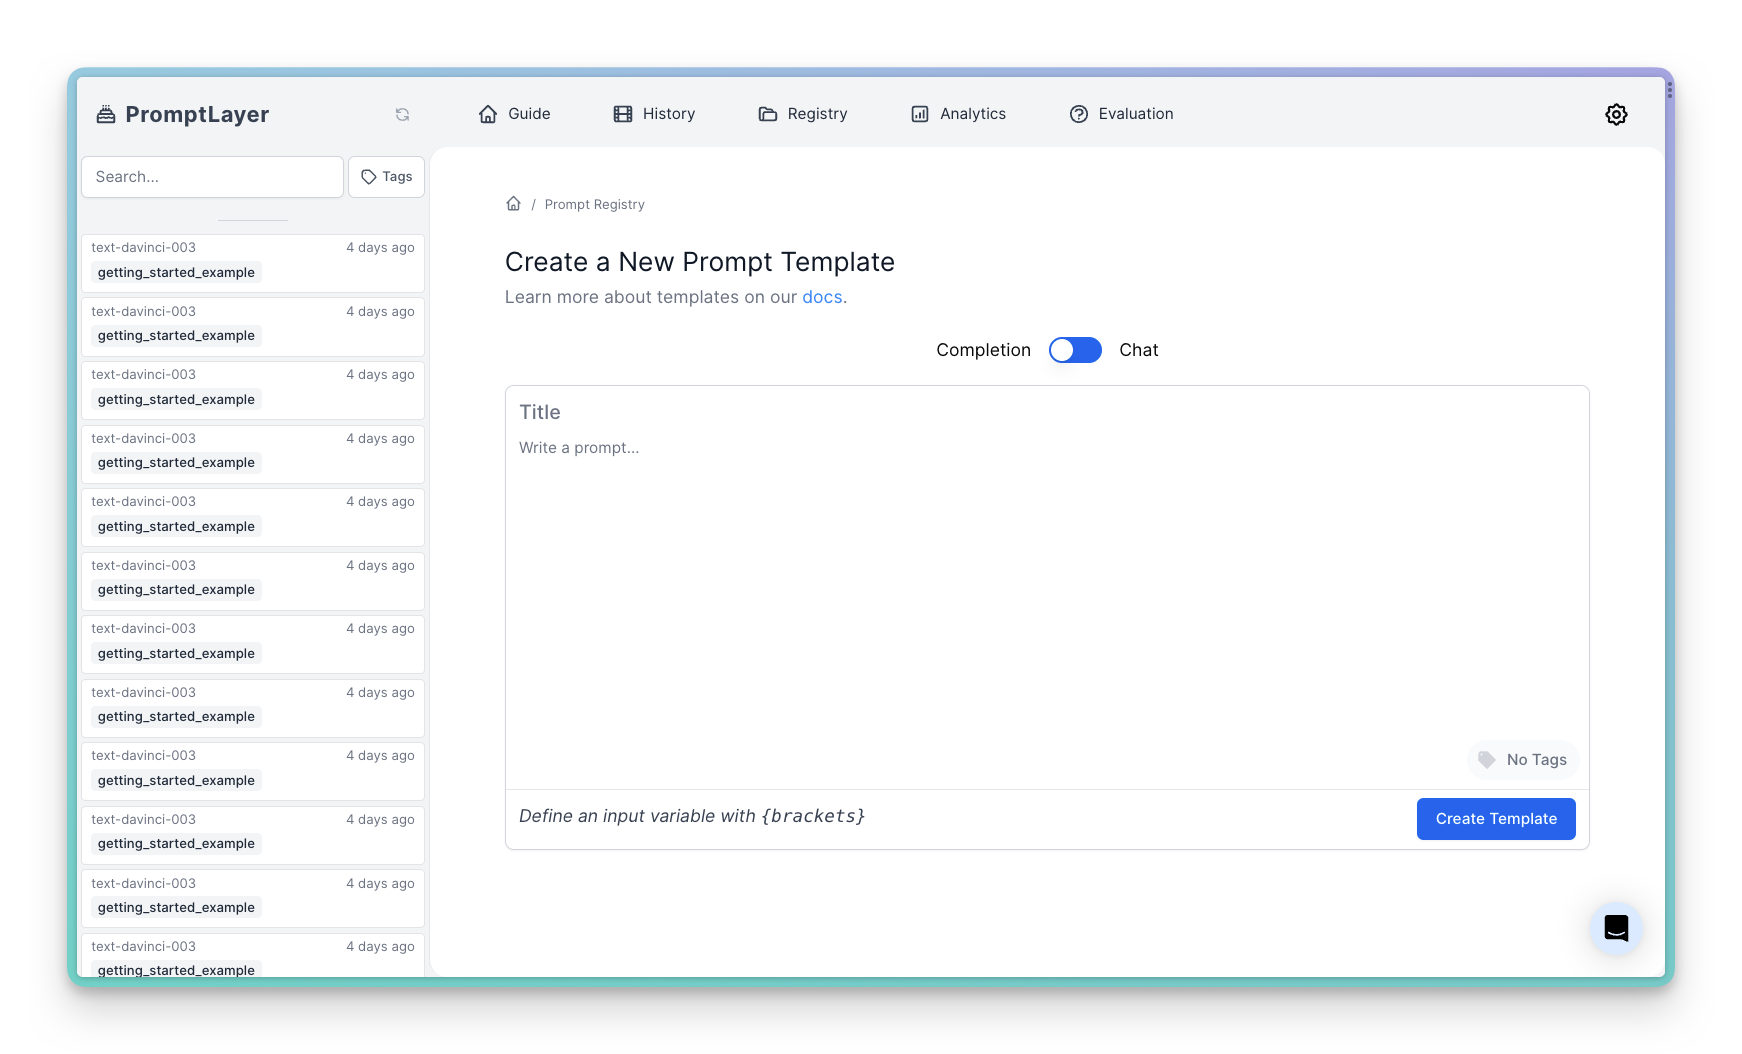
You may choose to select from one of the two supported template formats (f-string, jinja2) to declare variables. (f-string) allows you to declare variables using curly brackets ({variable_name}) while (jinja2) allows you to declare variables using double curly brackets ({{variable_name}}). For a more detailed explanation of both formats, see our Template Variables documentation.
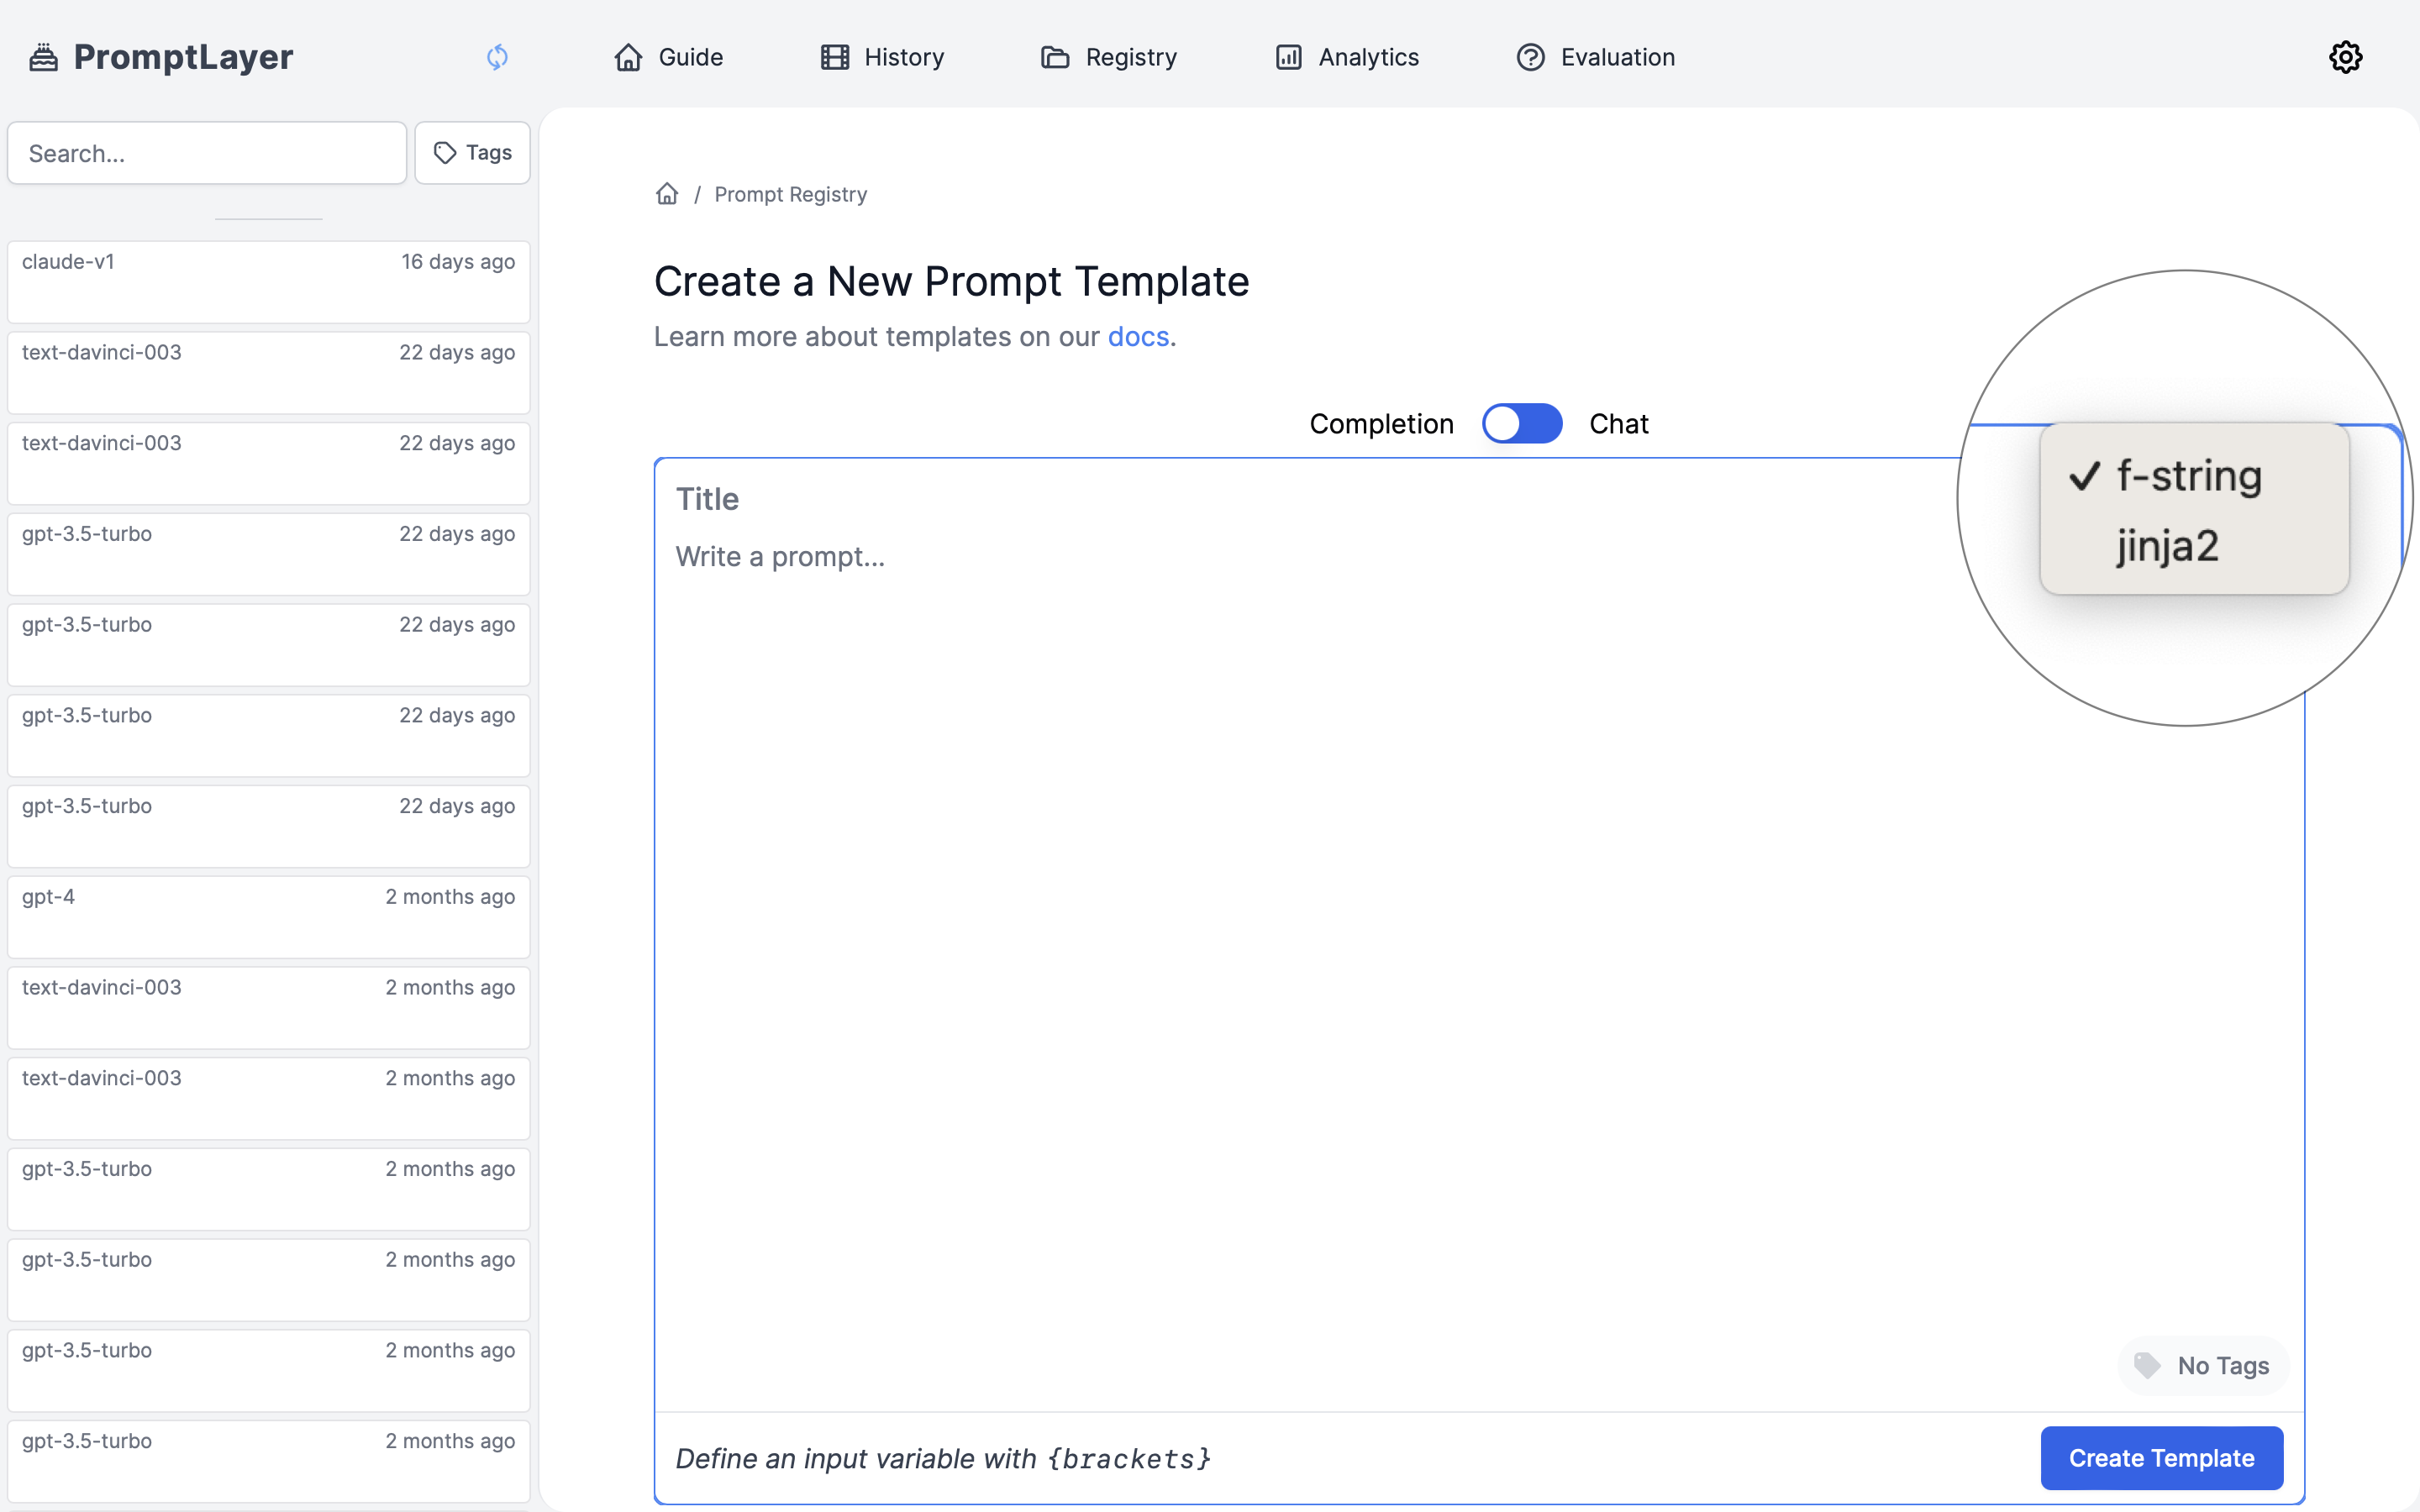
Visually
Programmatically
While it’s easiest to publish prompt templates visually through the dashboard, some users prefer the programatic interface detailed below.Release Labels
Prompt labels are a way to put a label on your prompt template to help you organize and search for them. This enables you to get a specific version of prompt using the label. You can add as many labels as you want to a prompt template with one restriction - the label must be unique across all versions. This means that you cannot have a label calledprod on both version 1 and version 2 of a prompt template. This restriction is in place to prevent confusion when searching for prompt templates.
You can also set release labels via the SDK
Commit Messages
Prompt commit messages allow you to set a brief 72 character-long description on each of your prompt template version to help you keep track of changes. You can also retrieve the commit messages through code. You’ll see them when you list all templates./prompt-templates/{identifier} (read more)
/rest/prompt-templates (read more)
Metadata
Custom metadata can be associated with individual prompt template versions. This allows you to set values such as provider, model, temperature, or any other key-value pair for each prompt template version. Please note that themodel attribute is reserved for model parameters, avoid putting custom metadata here.
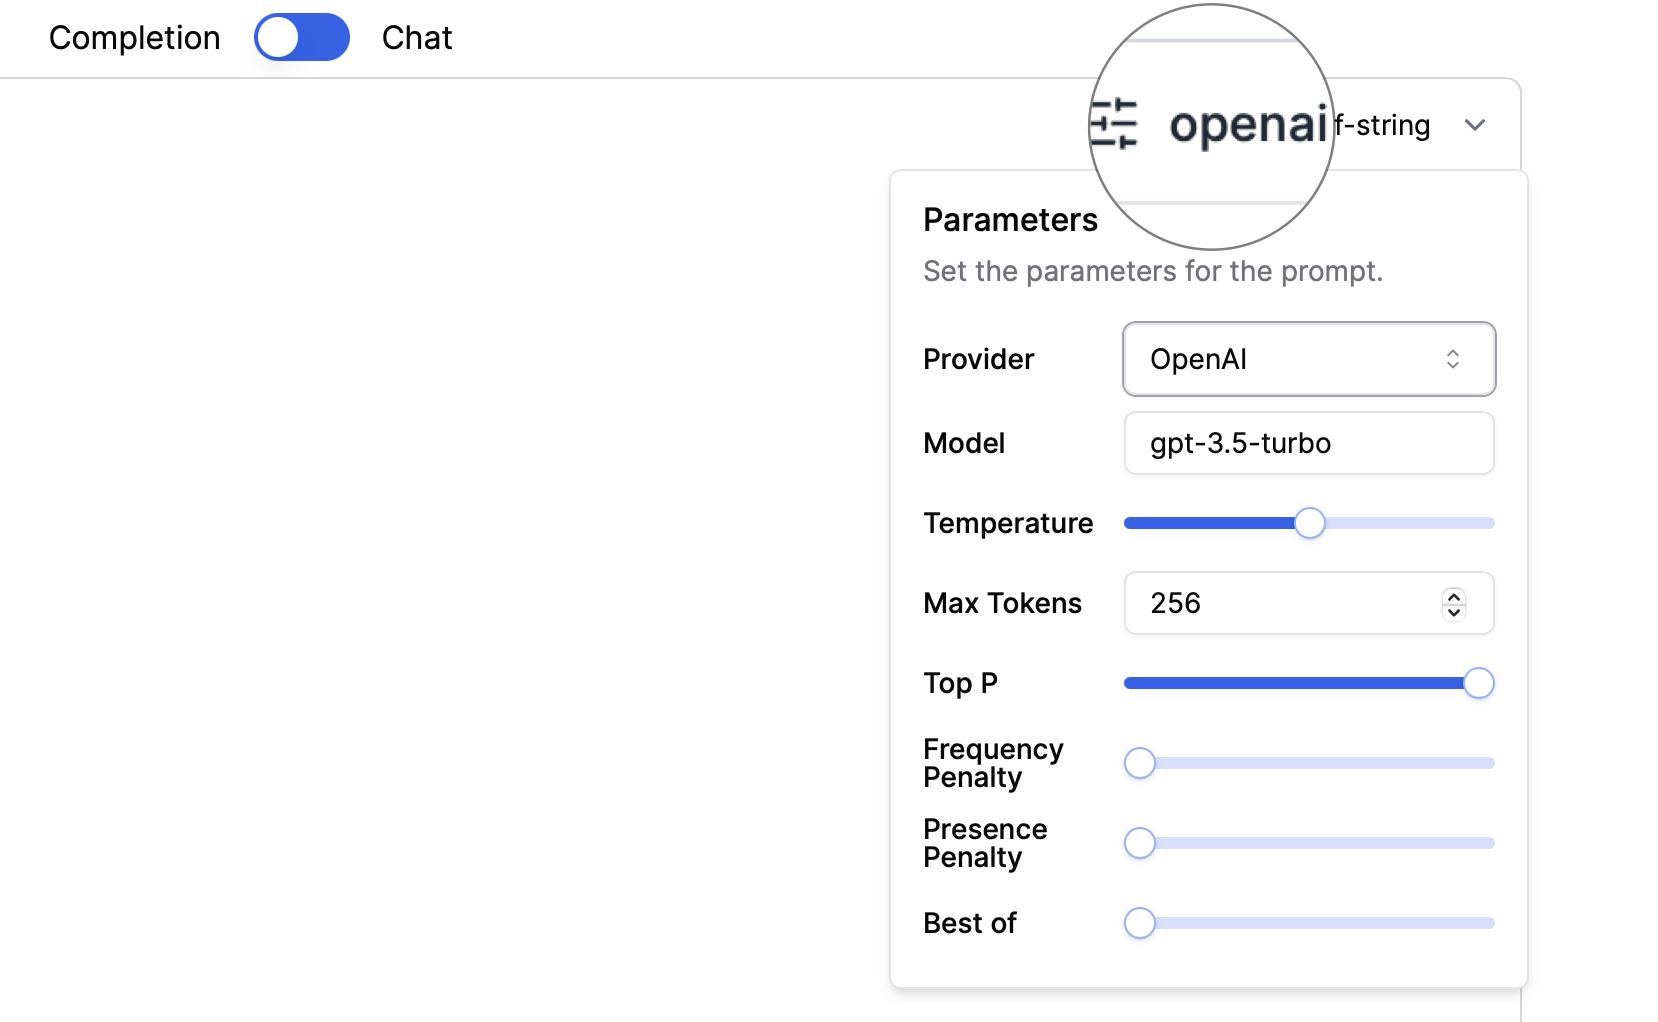
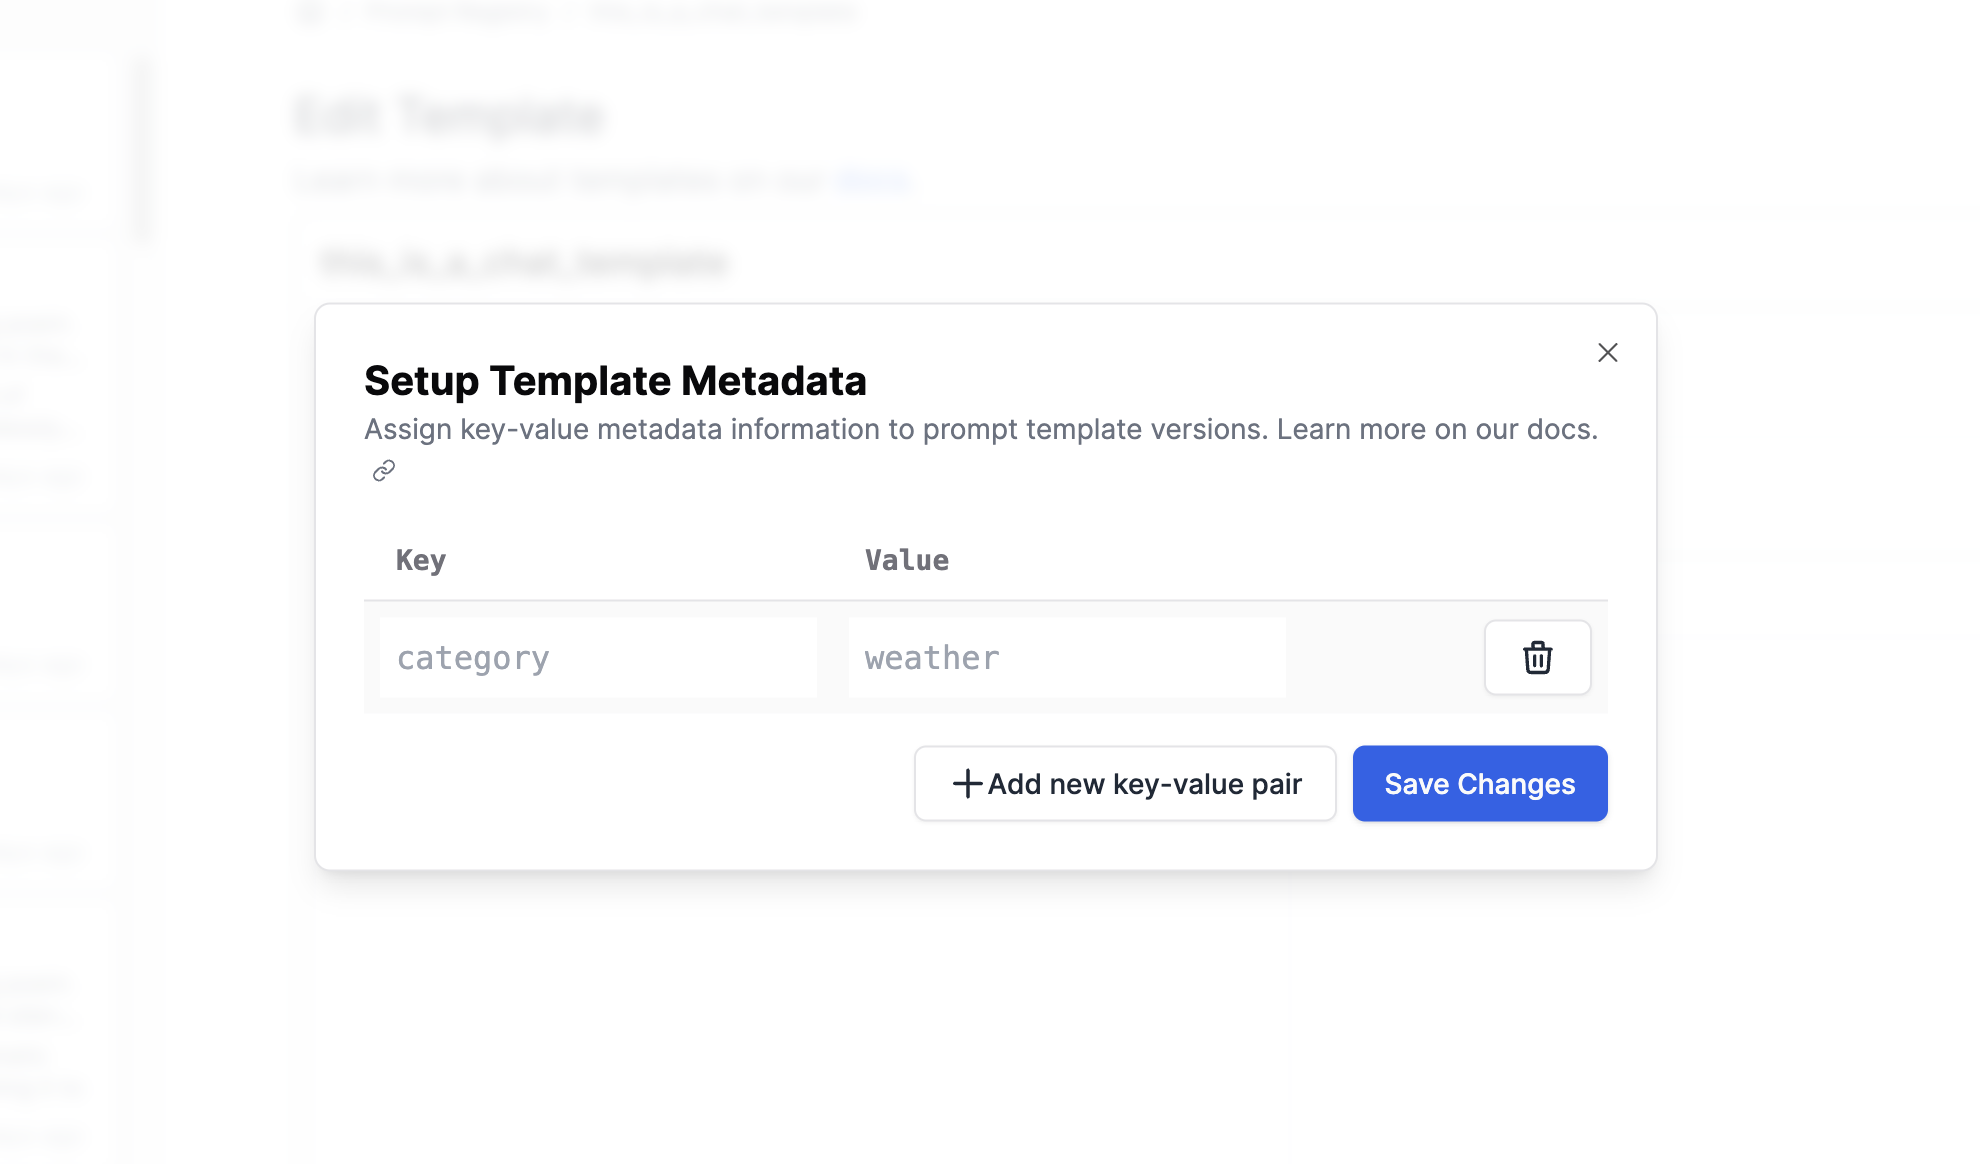
model metadata along with a custom category metadata:
/rest/prompt-templates (read more).
Tracking templates
The power of the Prompt Registry comes from associating requests with the template they used. This allows you to track average score, latency, and cost of each prompt template. You can also see the individual requests using the template.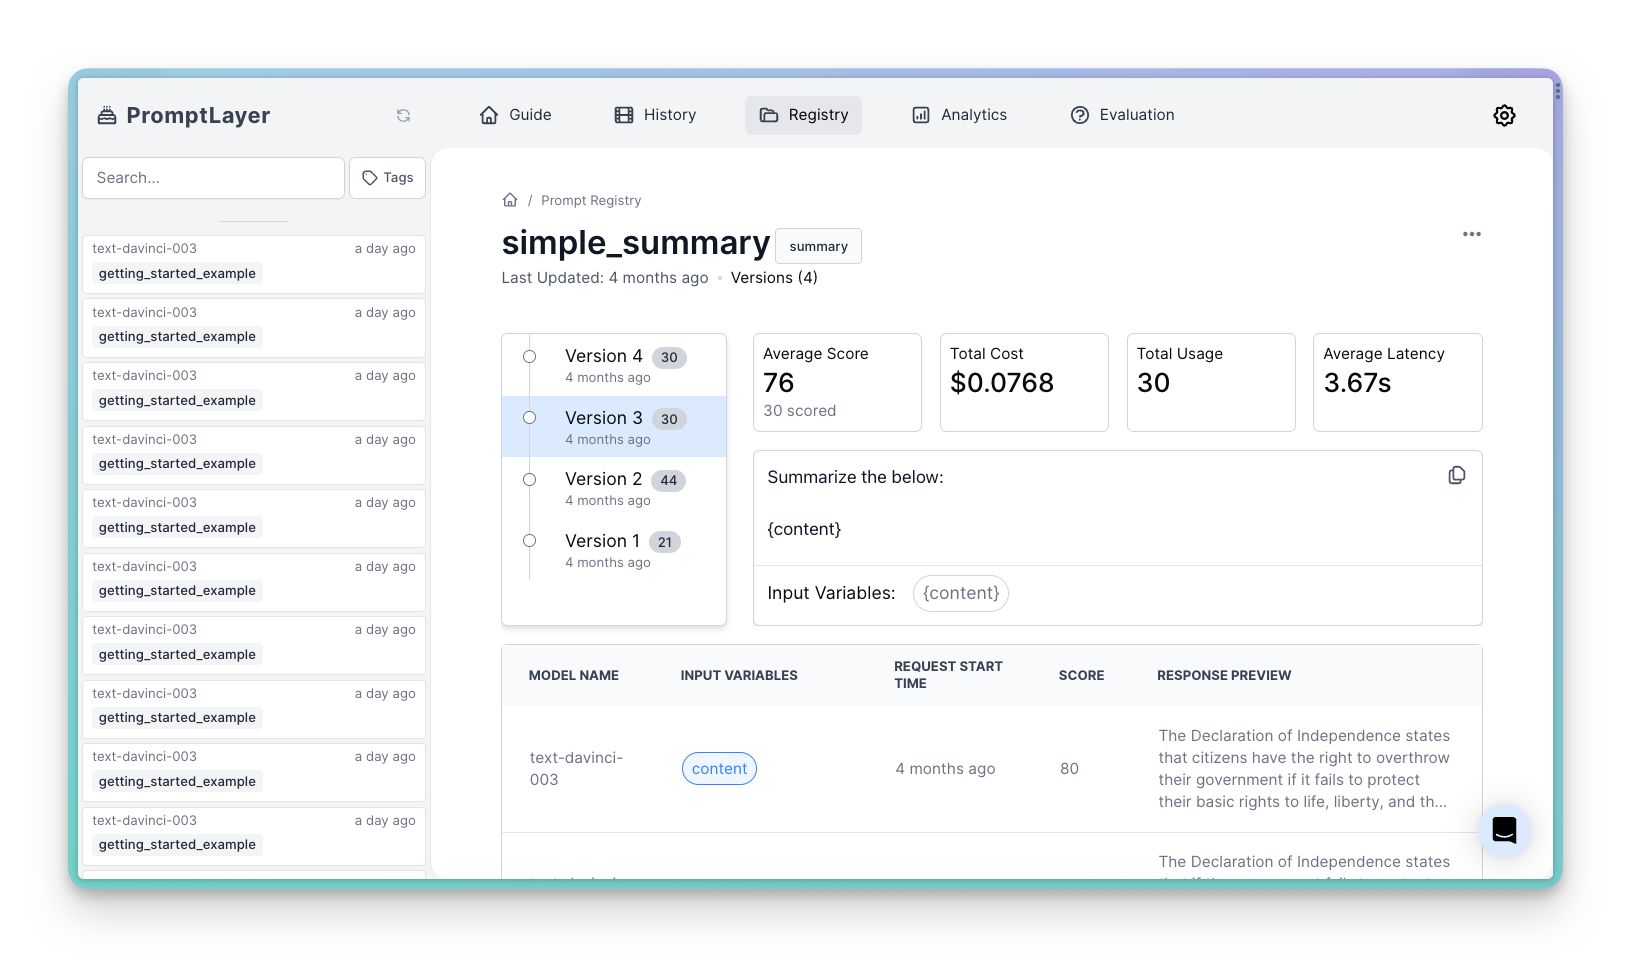
/rest/track-prompt (read more).
Learn more about tracking templates here
A/B Testing
The Prompt Registry, combined with our powerful A/B Releases feature, allows you to easily perform A/B tests on your prompts. This feature enables you to test different versions of your prompts in production, safely roll out updates, and segment users. With A/B Releases, you can:- Test new prompt versions with a subset of users before a full rollout
- Gradually release updates to minimize risk
- Segment users to receive specific versions (e.g., beta users, internal employees)
- Create multiple versions of a prompt template in the Prompt Registry.
- Use Dynamic Release Labels to split traffic between different prompt versions based on percentages or user segments.
- Retrieve the appropriate prompt version at runtime using the
getmethod with a release label.
Getting all Prompts Programmatically
To get all prompts from prompt registry you can use the following code snippet:per_page argument. For example, to get 100 prompts you can do the following:
page argument. For example, to get the second page of prompts you can do the following:
label argument. This will return all prompts that have that release label:
prompt_template represents the latest version of the prompt template.
Alternatively, use the REST API endpoint /prompt-templates (read more).
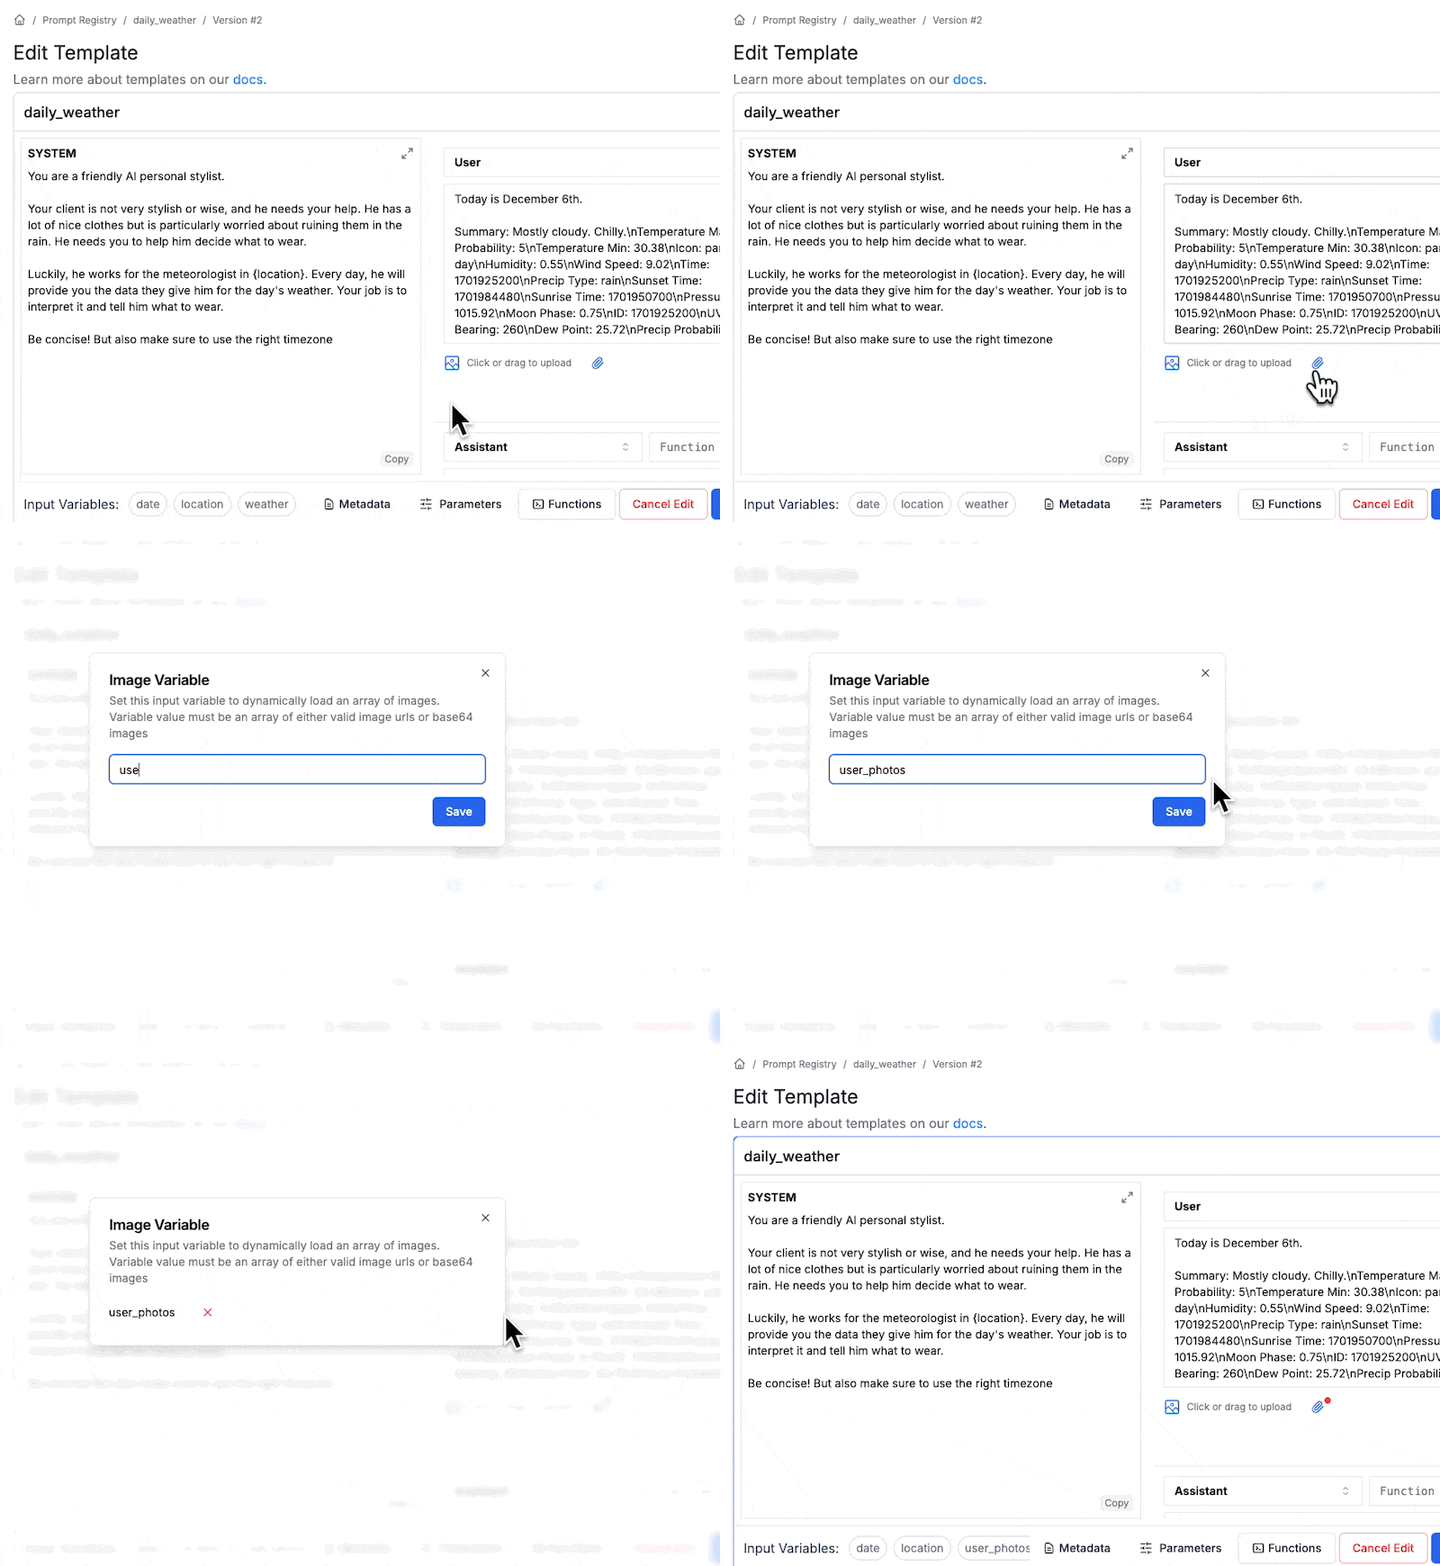
Using Images as Input Variables
You can dynamically set images into your user prompt by setting an image input variable in your prompt template. This allows you to provide a list of input images to be used in your prompt. To define an image input variable, simply click the attach icon in the prompt registry and enter a name for the variable in the resulting modal dialog.