> ## Documentation Index
> Fetch the complete documentation index at: https://docs.promptlayer.com/llms.txt
> Use this file to discover all available pages before exploring further.
# Quickstart
> Create, run, and evaluate your first prompt.
PromptLayer helps you manage prompts outside your code and evaluate changes before they reach production. In this quickstart, you will create a prompt, run it in the dashboard and from code, then build an evaluation for it.
## Prerequisites
Before you start, make sure you have a [PromptLayer account](https://dashboard.promptlayer.com/create-account).
**Using a coding agent?**
Copy the following prompt to add the PromptLayer **skill** and **MCP servers** for better results when working with PromptLayer.
Install the PromptLayer skill for context on project structure, SDKs, prompts, evaluations, observability, and PromptLayer best practices:
npx skills add [https://docs.promptlayer.com](https://docs.promptlayer.com)
Add the PromptLayer Docs MCP server for documentation search:
[https://docs.promptlayer.com/mcp](https://docs.promptlayer.com/mcp)
Add the PromptLayer MCP server for PromptLayer workspace access and content management:
[https://mcp.promptlayer.com/mcp](https://mcp.promptlayer.com/mcp)
## Create a prompt
From the PromptLayer dashboard, click **New** -> **Prompt**.
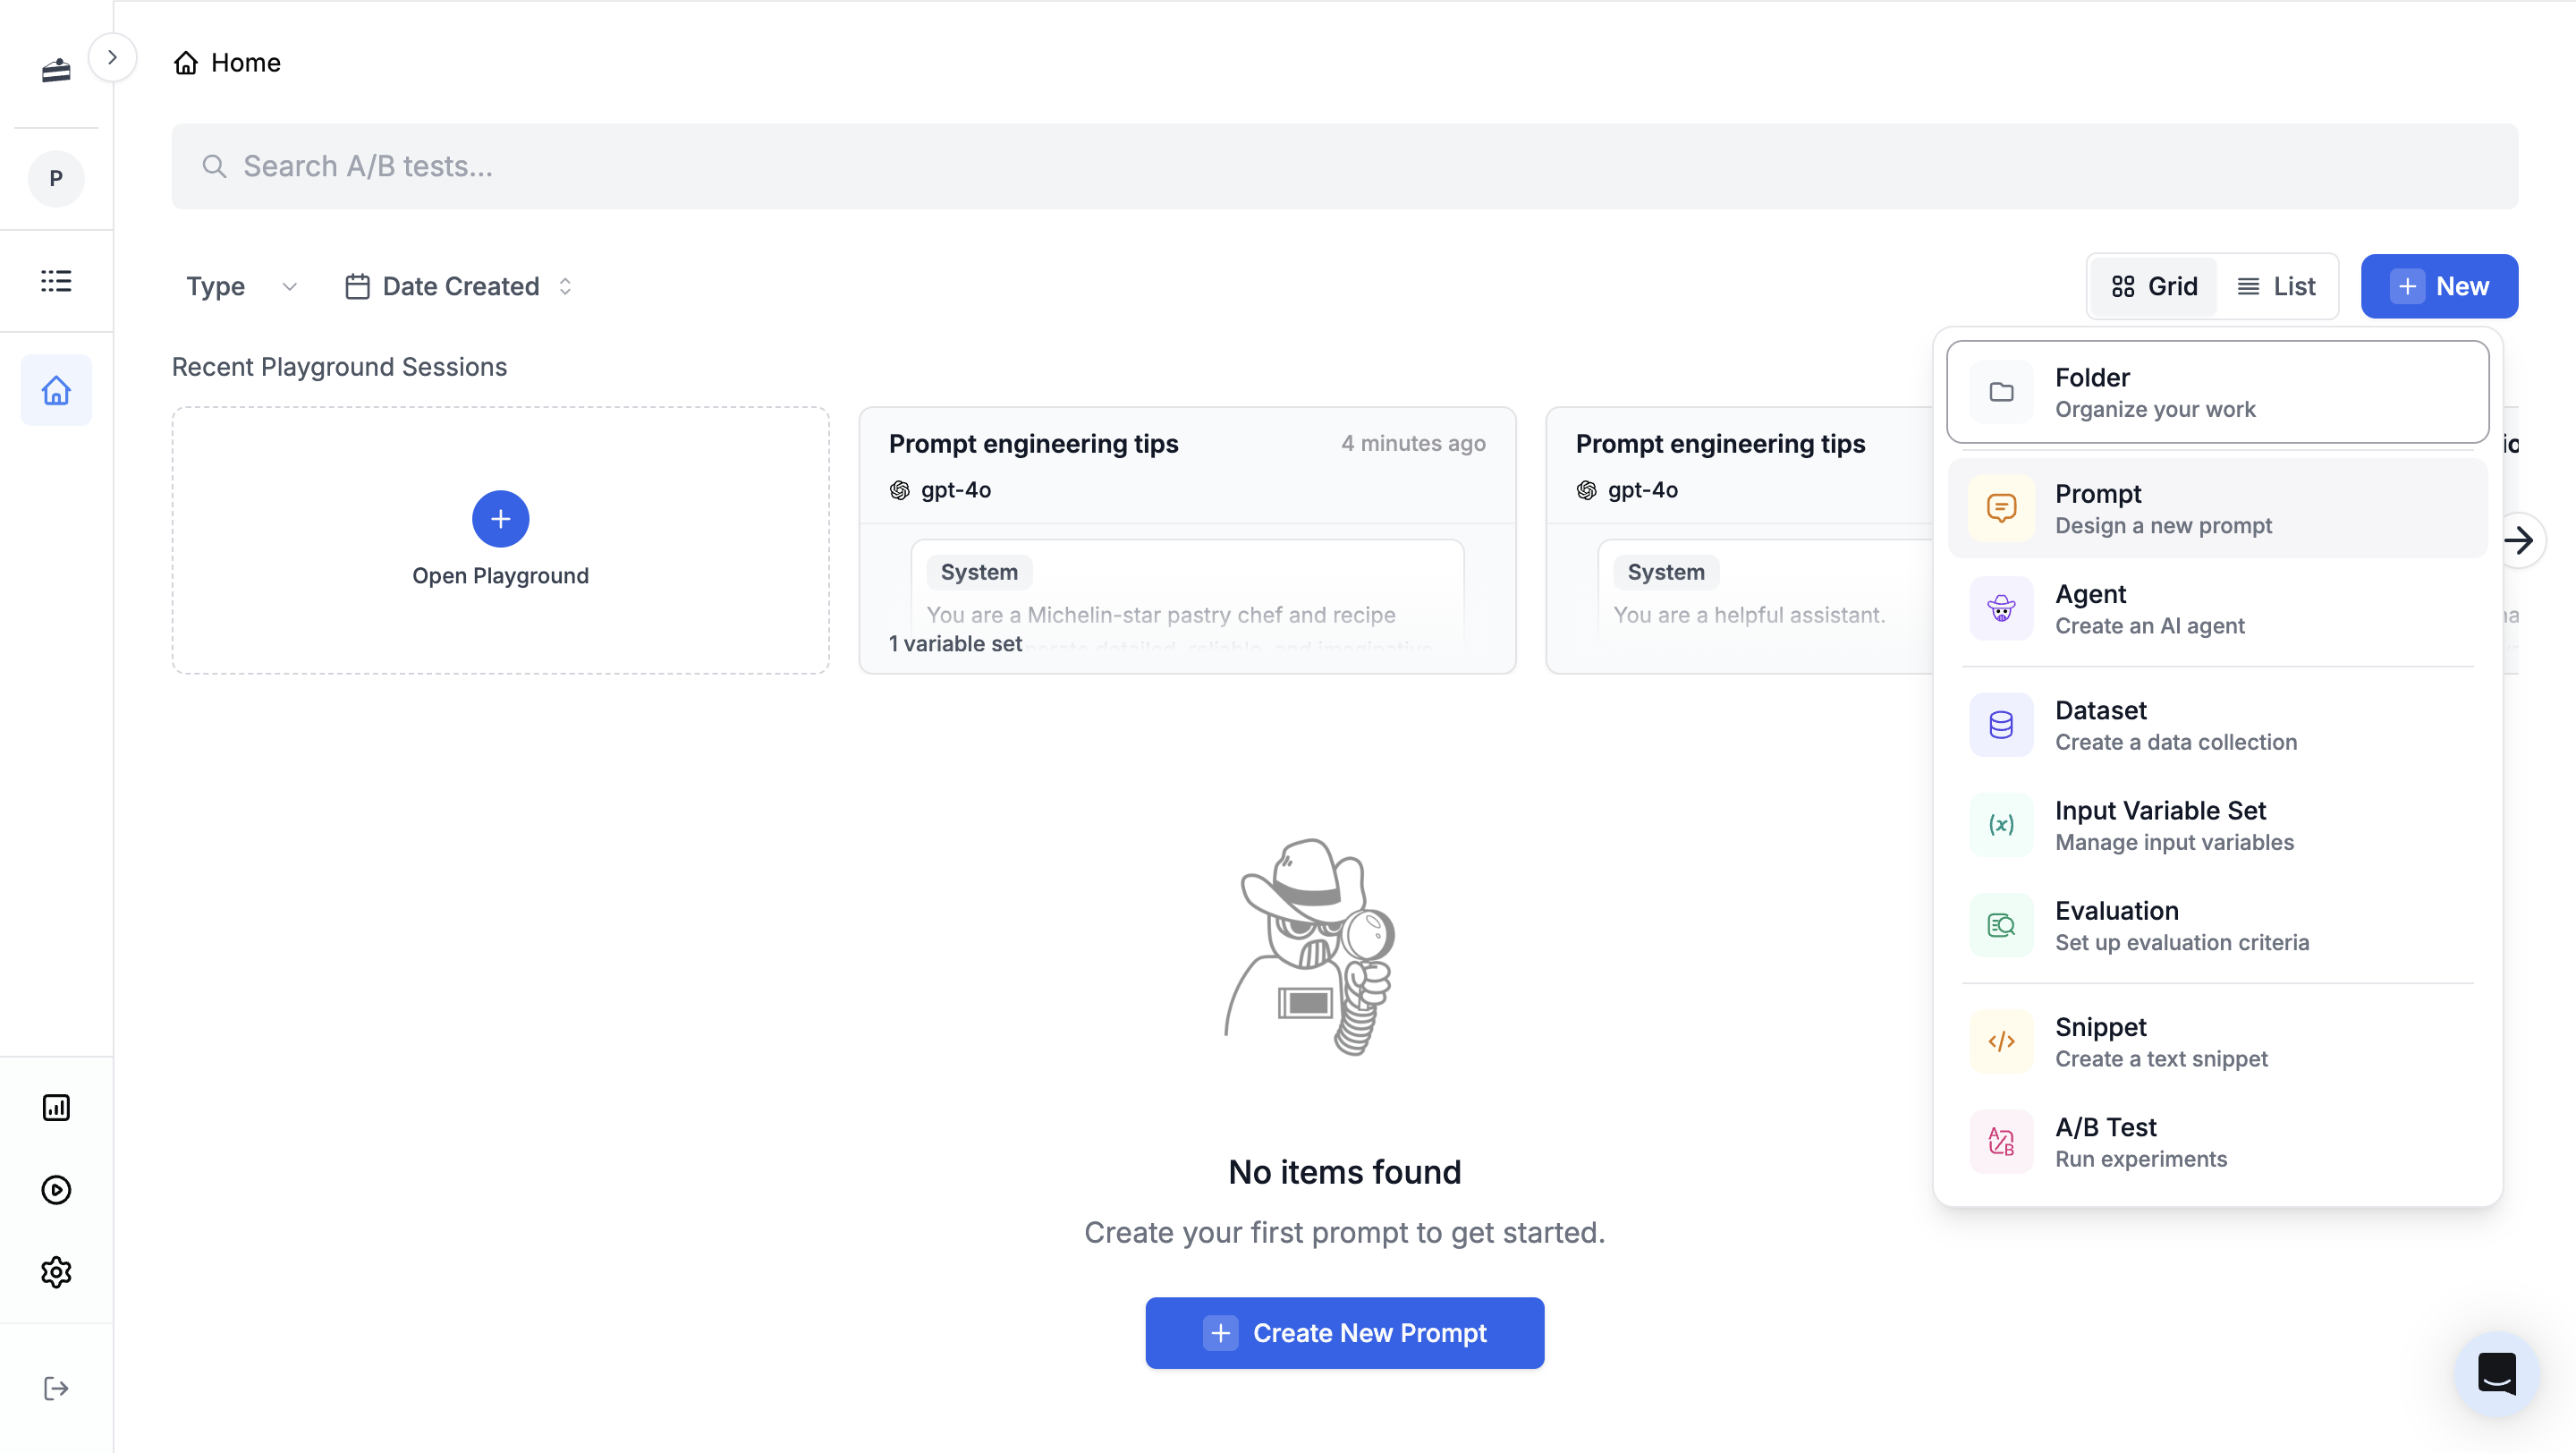 Name the prompt `cake-recipe`, then replace the default messages with the following content.
```markdown System theme={null}
You are a Michelin-star pastry chef. Generate cake recipes with:
**Overview**: One paragraph about the cake
**Ingredients**: Bullet points with metric and US measurements
**Instructions**: Numbered steps with temperatures and timing
**Variations**: Optional frostings or substitutions
```
```markdown User theme={null}
Create a recipe for {{cake_type}} that serves {{serving_size}} people.
```
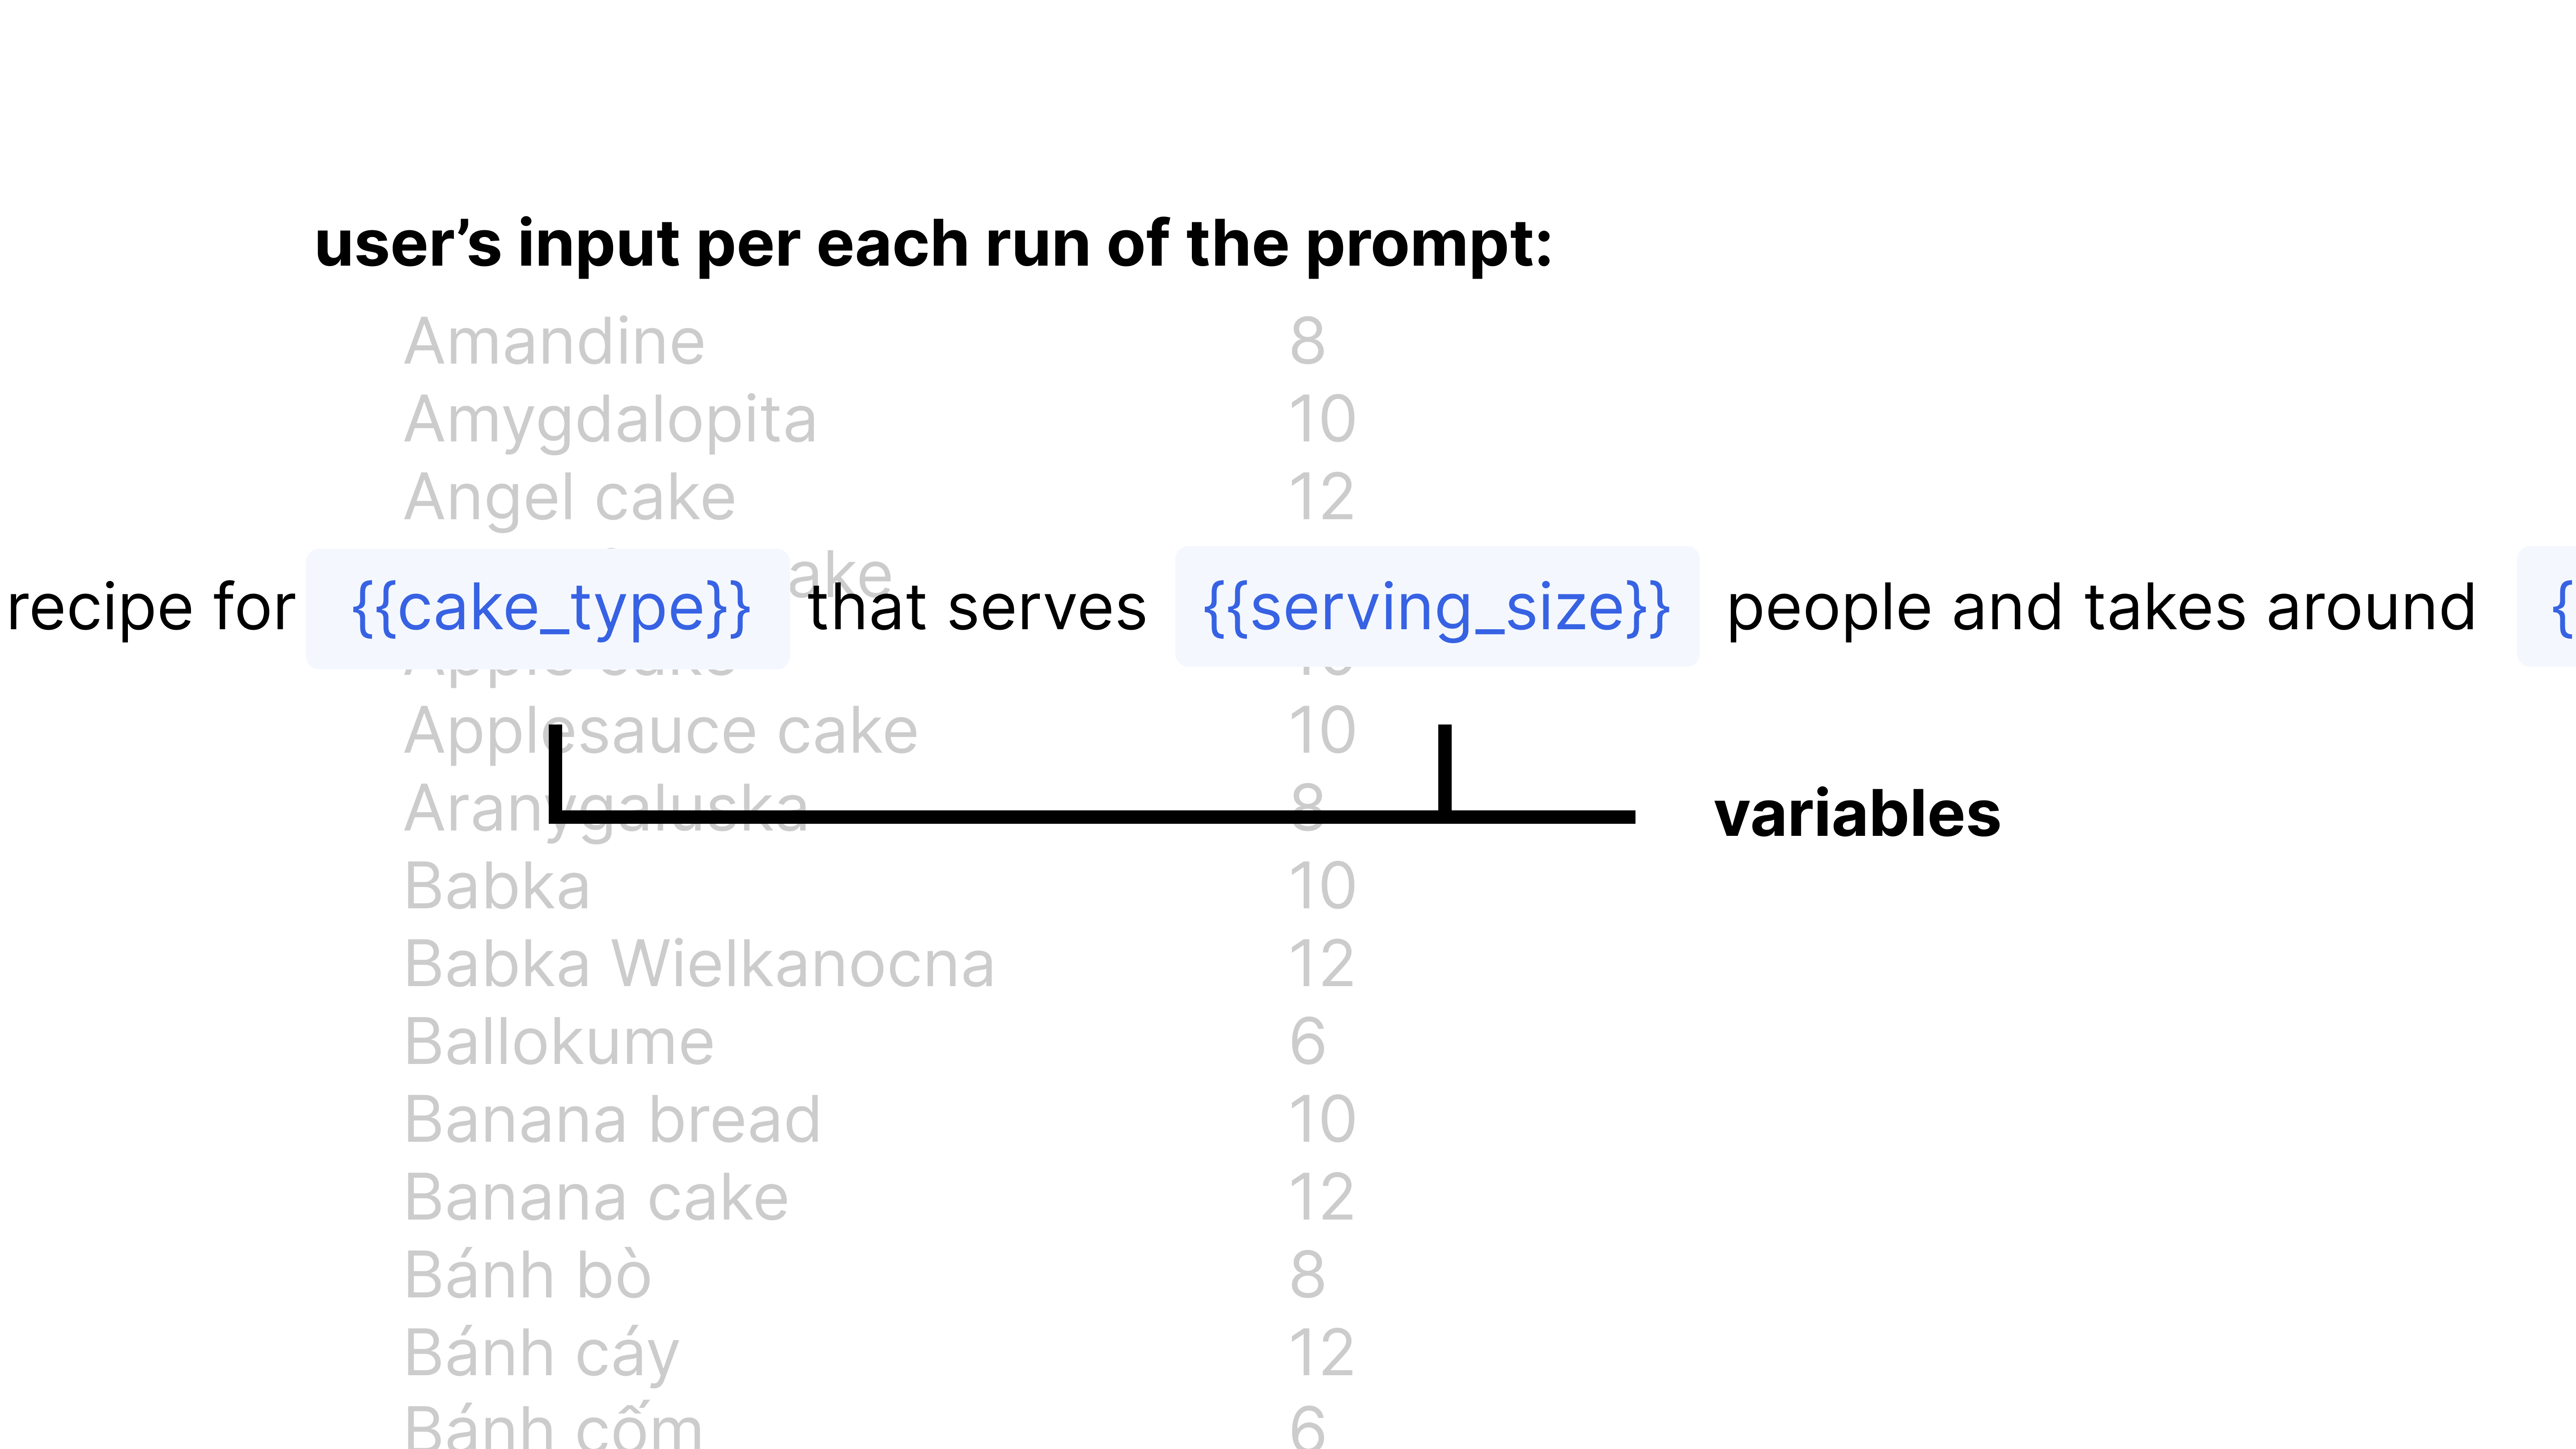
`{{cake_type}}` and `{{serving_size}}` are [input variables](/features/prompt-registry/template-variables). PromptLayer fills them in each time you run the prompt.
Name the prompt `cake-recipe`, then replace the default messages with the following content.
```markdown System theme={null}
You are a Michelin-star pastry chef. Generate cake recipes with:
**Overview**: One paragraph about the cake
**Ingredients**: Bullet points with metric and US measurements
**Instructions**: Numbered steps with temperatures and timing
**Variations**: Optional frostings or substitutions
```
```markdown User theme={null}
Create a recipe for {{cake_type}} that serves {{serving_size}} people.
```
`{{cake_type}}` and `{{serving_size}}` are [input variables](/features/prompt-registry/template-variables). PromptLayer fills them in each time you run the prompt.
 ### Write prompts with AI
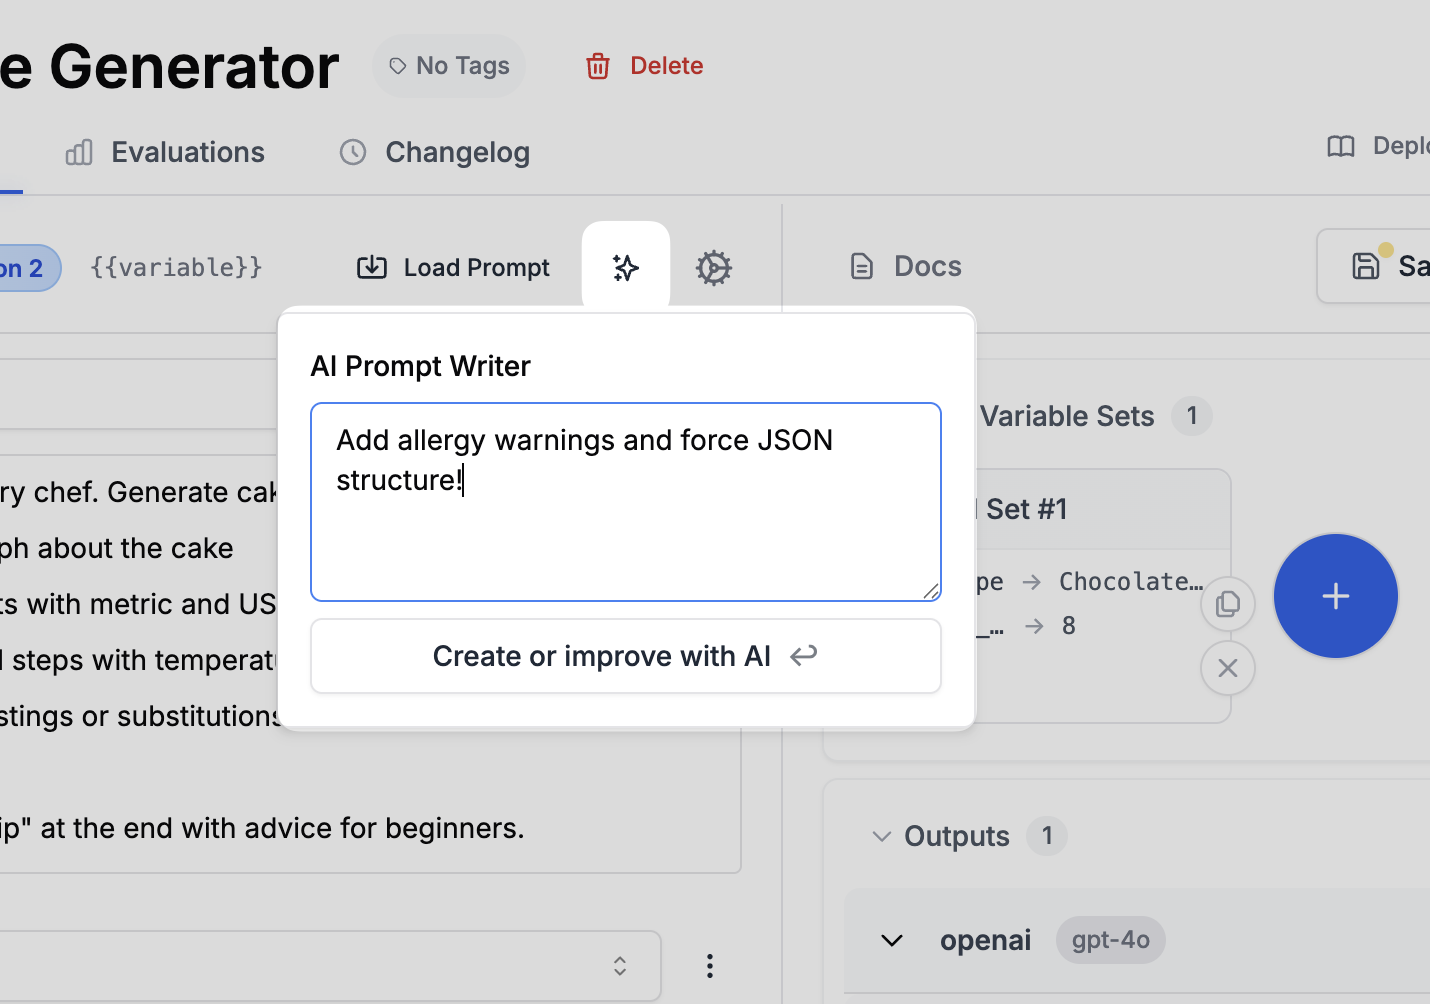
Click the magic wand icon to open the AI prompt writer. It can help rewrite or improve your prompts based on your instructions. Try asking it to add allergy warnings to the recipe generator.
### Write prompts with AI
Click the magic wand icon to open the AI prompt writer. It can help rewrite or improve your prompts based on your instructions. Try asking it to add allergy warnings to the recipe generator.
 ### Run your prompt
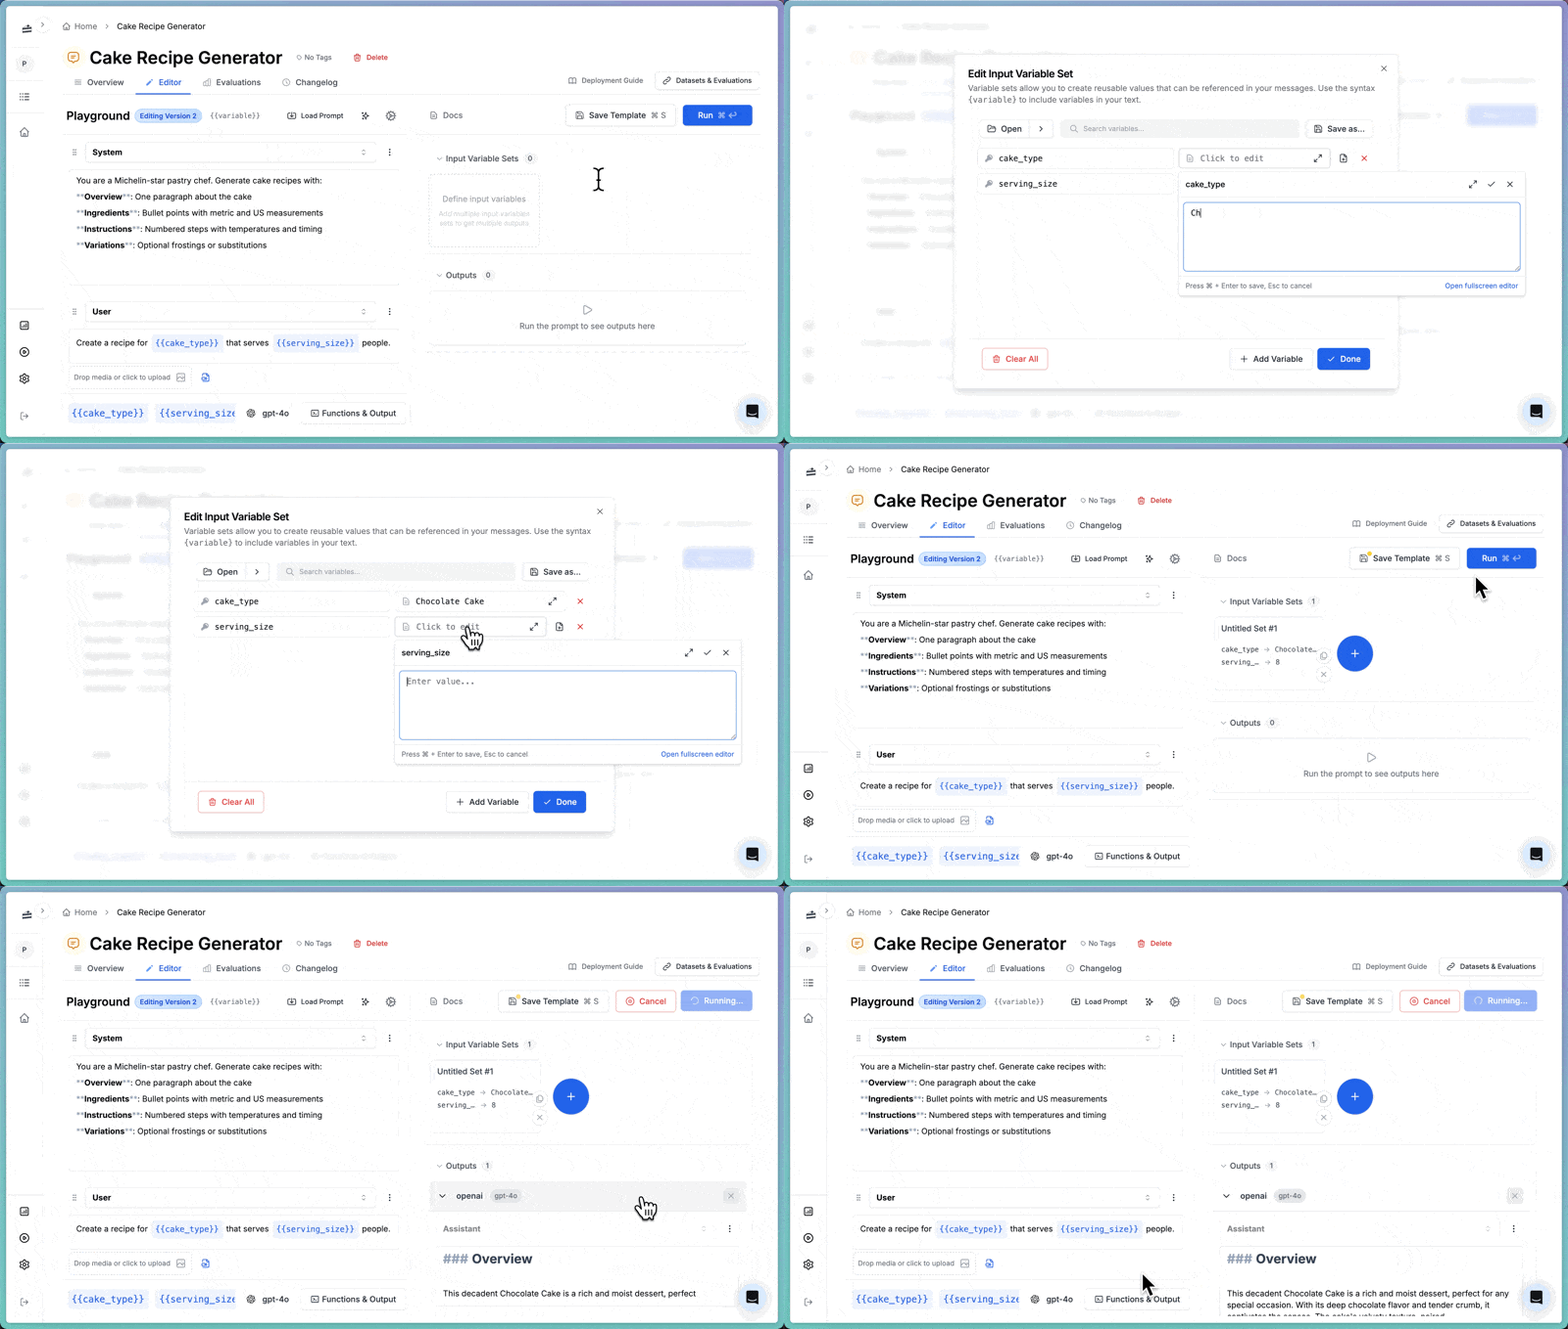
To test the prompt in the playground:
1. Click **Define input variables** in the right panel.
2. Set `cake_type` to `Chocolate Cake`.
3. Set `serving_size` to `8`.
4. Click **Run**.
### Run your prompt
To test the prompt in the playground:
1. Click **Define input variables** in the right panel.
2. Set `cake_type` to `Chocolate Cake`.
3. Set `serving_size` to `8`.
4. Click **Run**.
 When the response looks right, click **Save Template**.
### View logs
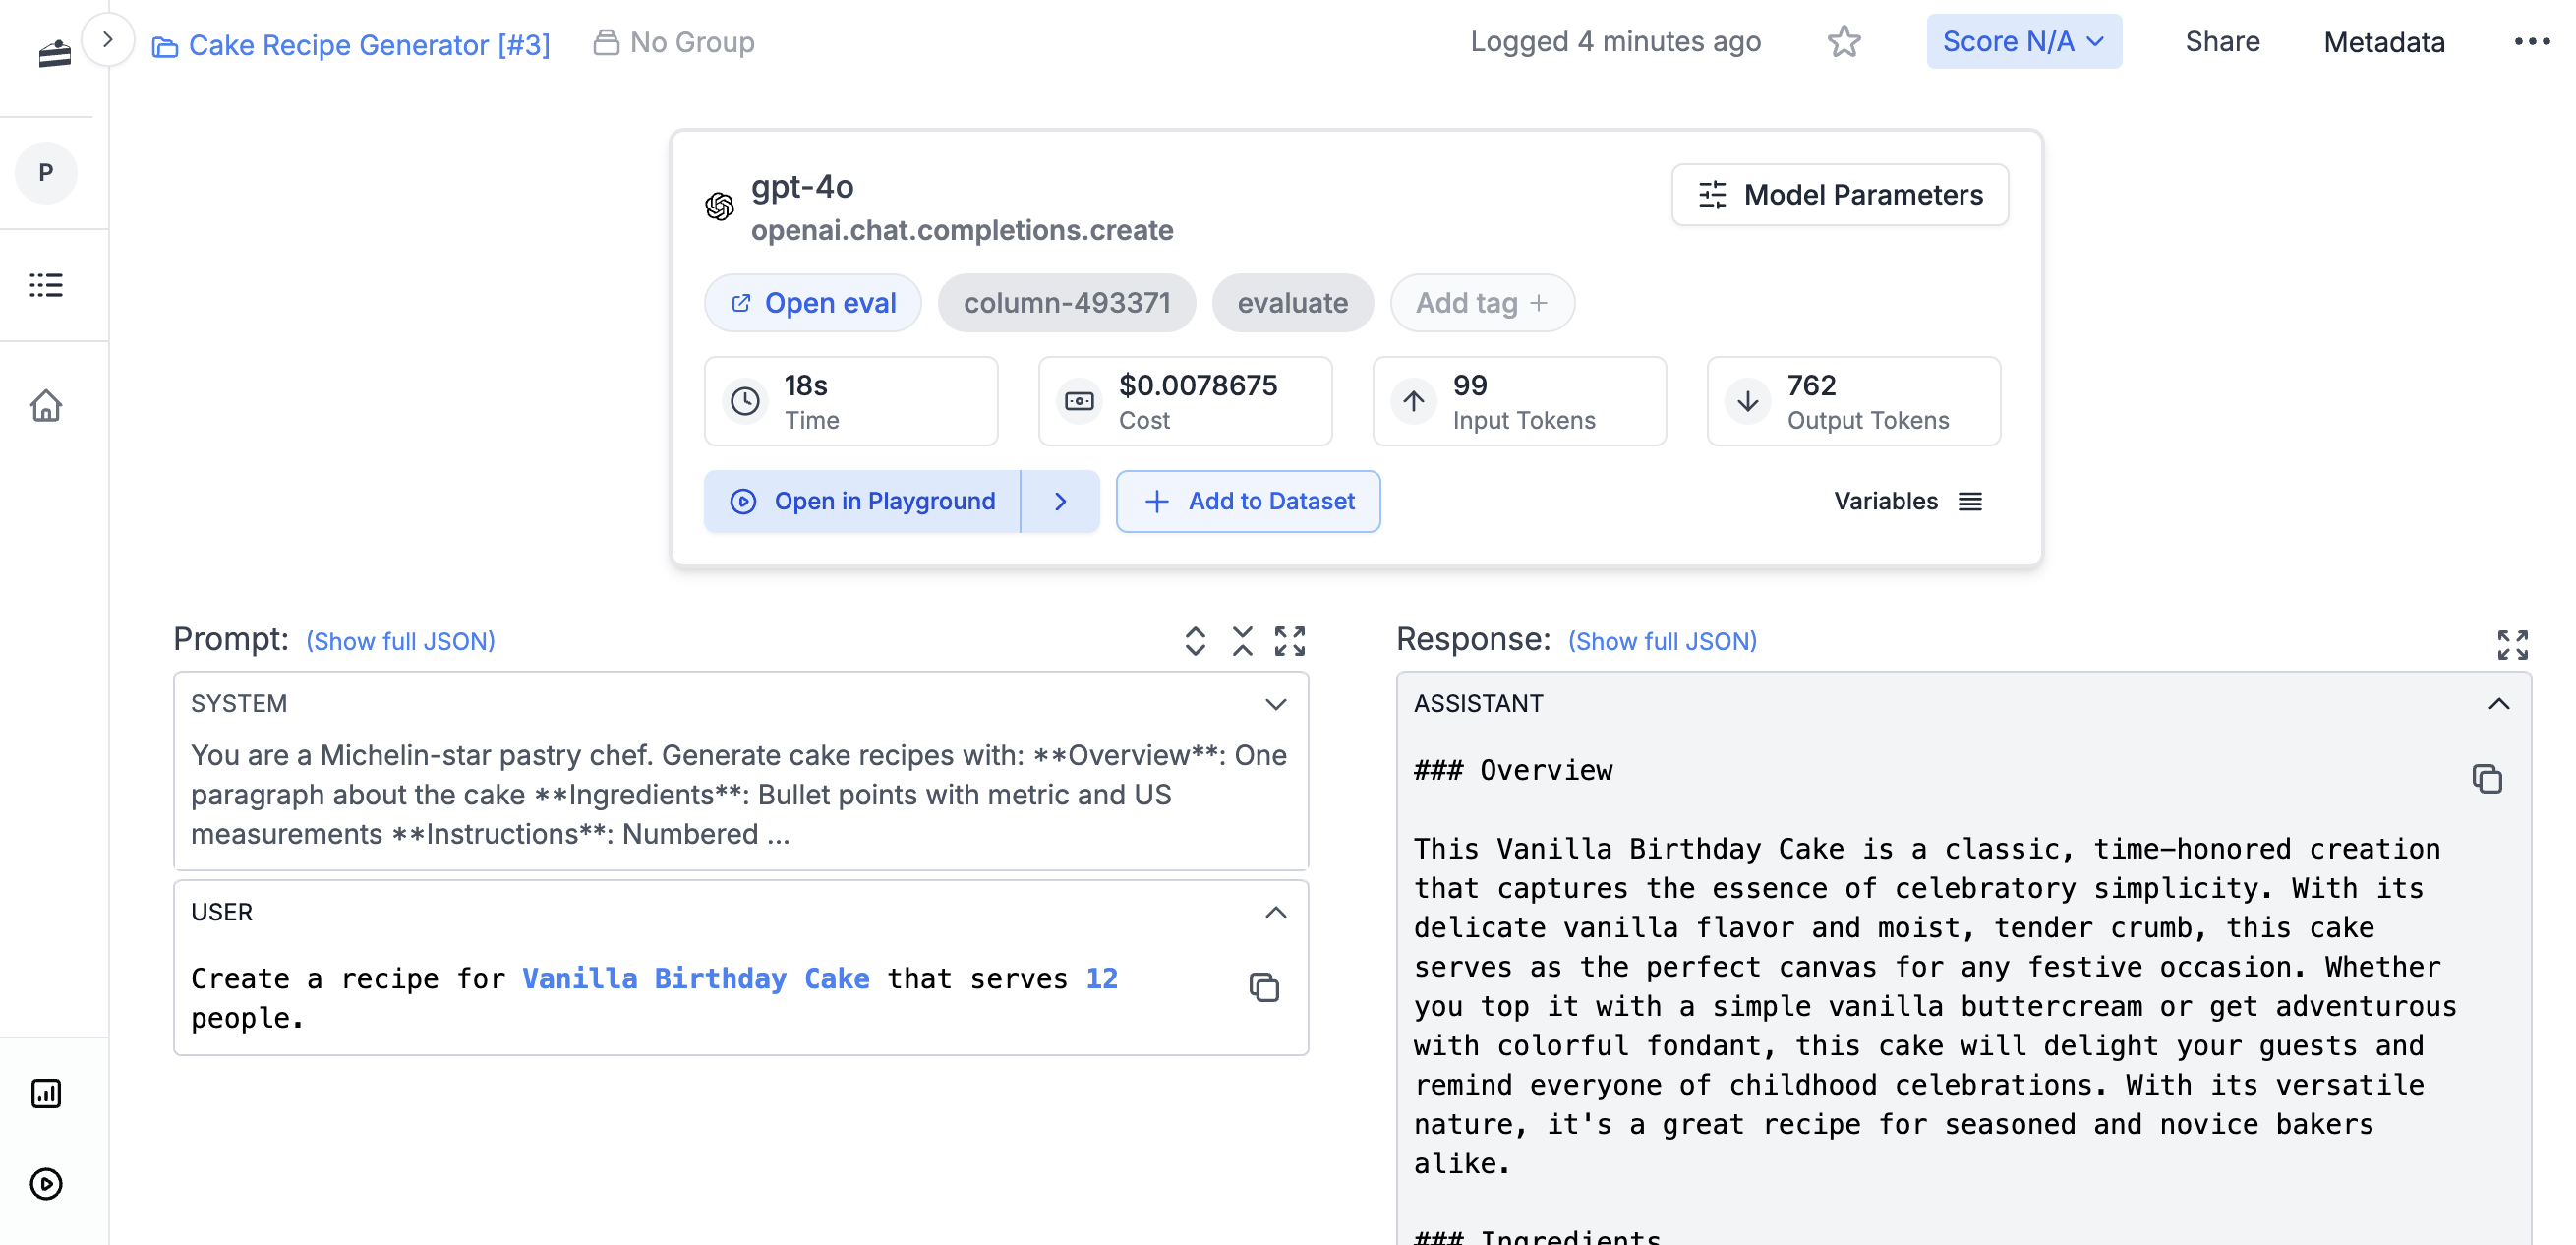
Open **Logs** in PromptLayer and search for `cake-recipe`. The log should show the input variables, generated output, model, and latency.
When the response looks right, click **Save Template**.
### View logs
Open **Logs** in PromptLayer and search for `cake-recipe`. The log should show the input variables, generated output, model, and latency.
 ### Run from code
To run the prompt from code, make sure you have:
* A PromptLayer API key from your workspace
* A provider API key for the model you plan to use, such as `OPENAI_API_KEY`
Set your API keys as environment variables before running the example.
```bash theme={null}
export PROMPTLAYER_API_KEY="pl_your_promptlayer_api_key"
export OPENAI_API_KEY="sk_your_provider_api_key"
```
Install the PromptLayer SDK for your runtime.
```bash Python theme={null}
pip install promptlayer
```
```bash JavaScript theme={null}
npm install promptlayer
```
Run the saved prompt with the same input variables.
```python Python theme={null}
from promptlayer import PromptLayer
client = PromptLayer()
response = client.run(
prompt_name="cake-recipe",
input_variables={
"cake_type": "Chocolate Cake",
"serving_size": "8"
},
tags=["quickstart"],
metadata={"source": "quickstart"}
)
print(response["prompt_blueprint"]["prompt_template"]["messages"][-1]["content"])
```
```javascript JavaScript theme={null}
import { PromptLayer } from "promptlayer";
const client = new PromptLayer({
apiKey: process.env.PROMPTLAYER_API_KEY,
});
const response = await client.run({
promptName: "cake-recipe",
inputVariables: {
cake_type: "Chocolate Cake",
serving_size: "8",
},
tags: ["quickstart"],
metadata: { source: "quickstart" },
});
console.log(response.prompt_blueprint.prompt_template.messages.slice(-1)[0].content);
```
## Evaluate a prompt
Before deploying a prompt, you want to know if it is actually good. PromptLayer lets you build evaluation pipelines that score your prompt's outputs automatically.
### Create a dataset
Evaluations run against a dataset: a collection of test cases with inputs and expected outputs. Create one for the cake recipe prompt.
Click **New** -> **Dataset** and name it `cake-recipes-test`.
### Run from code
To run the prompt from code, make sure you have:
* A PromptLayer API key from your workspace
* A provider API key for the model you plan to use, such as `OPENAI_API_KEY`
Set your API keys as environment variables before running the example.
```bash theme={null}
export PROMPTLAYER_API_KEY="pl_your_promptlayer_api_key"
export OPENAI_API_KEY="sk_your_provider_api_key"
```
Install the PromptLayer SDK for your runtime.
```bash Python theme={null}
pip install promptlayer
```
```bash JavaScript theme={null}
npm install promptlayer
```
Run the saved prompt with the same input variables.
```python Python theme={null}
from promptlayer import PromptLayer
client = PromptLayer()
response = client.run(
prompt_name="cake-recipe",
input_variables={
"cake_type": "Chocolate Cake",
"serving_size": "8"
},
tags=["quickstart"],
metadata={"source": "quickstart"}
)
print(response["prompt_blueprint"]["prompt_template"]["messages"][-1]["content"])
```
```javascript JavaScript theme={null}
import { PromptLayer } from "promptlayer";
const client = new PromptLayer({
apiKey: process.env.PROMPTLAYER_API_KEY,
});
const response = await client.run({
promptName: "cake-recipe",
inputVariables: {
cake_type: "Chocolate Cake",
serving_size: "8",
},
tags: ["quickstart"],
metadata: { source: "quickstart" },
});
console.log(response.prompt_blueprint.prompt_template.messages.slice(-1)[0].content);
```
## Evaluate a prompt
Before deploying a prompt, you want to know if it is actually good. PromptLayer lets you build evaluation pipelines that score your prompt's outputs automatically.
### Create a dataset
Evaluations run against a dataset: a collection of test cases with inputs and expected outputs. Create one for the cake recipe prompt.
Click **New** -> **Dataset** and name it `cake-recipes-test`.
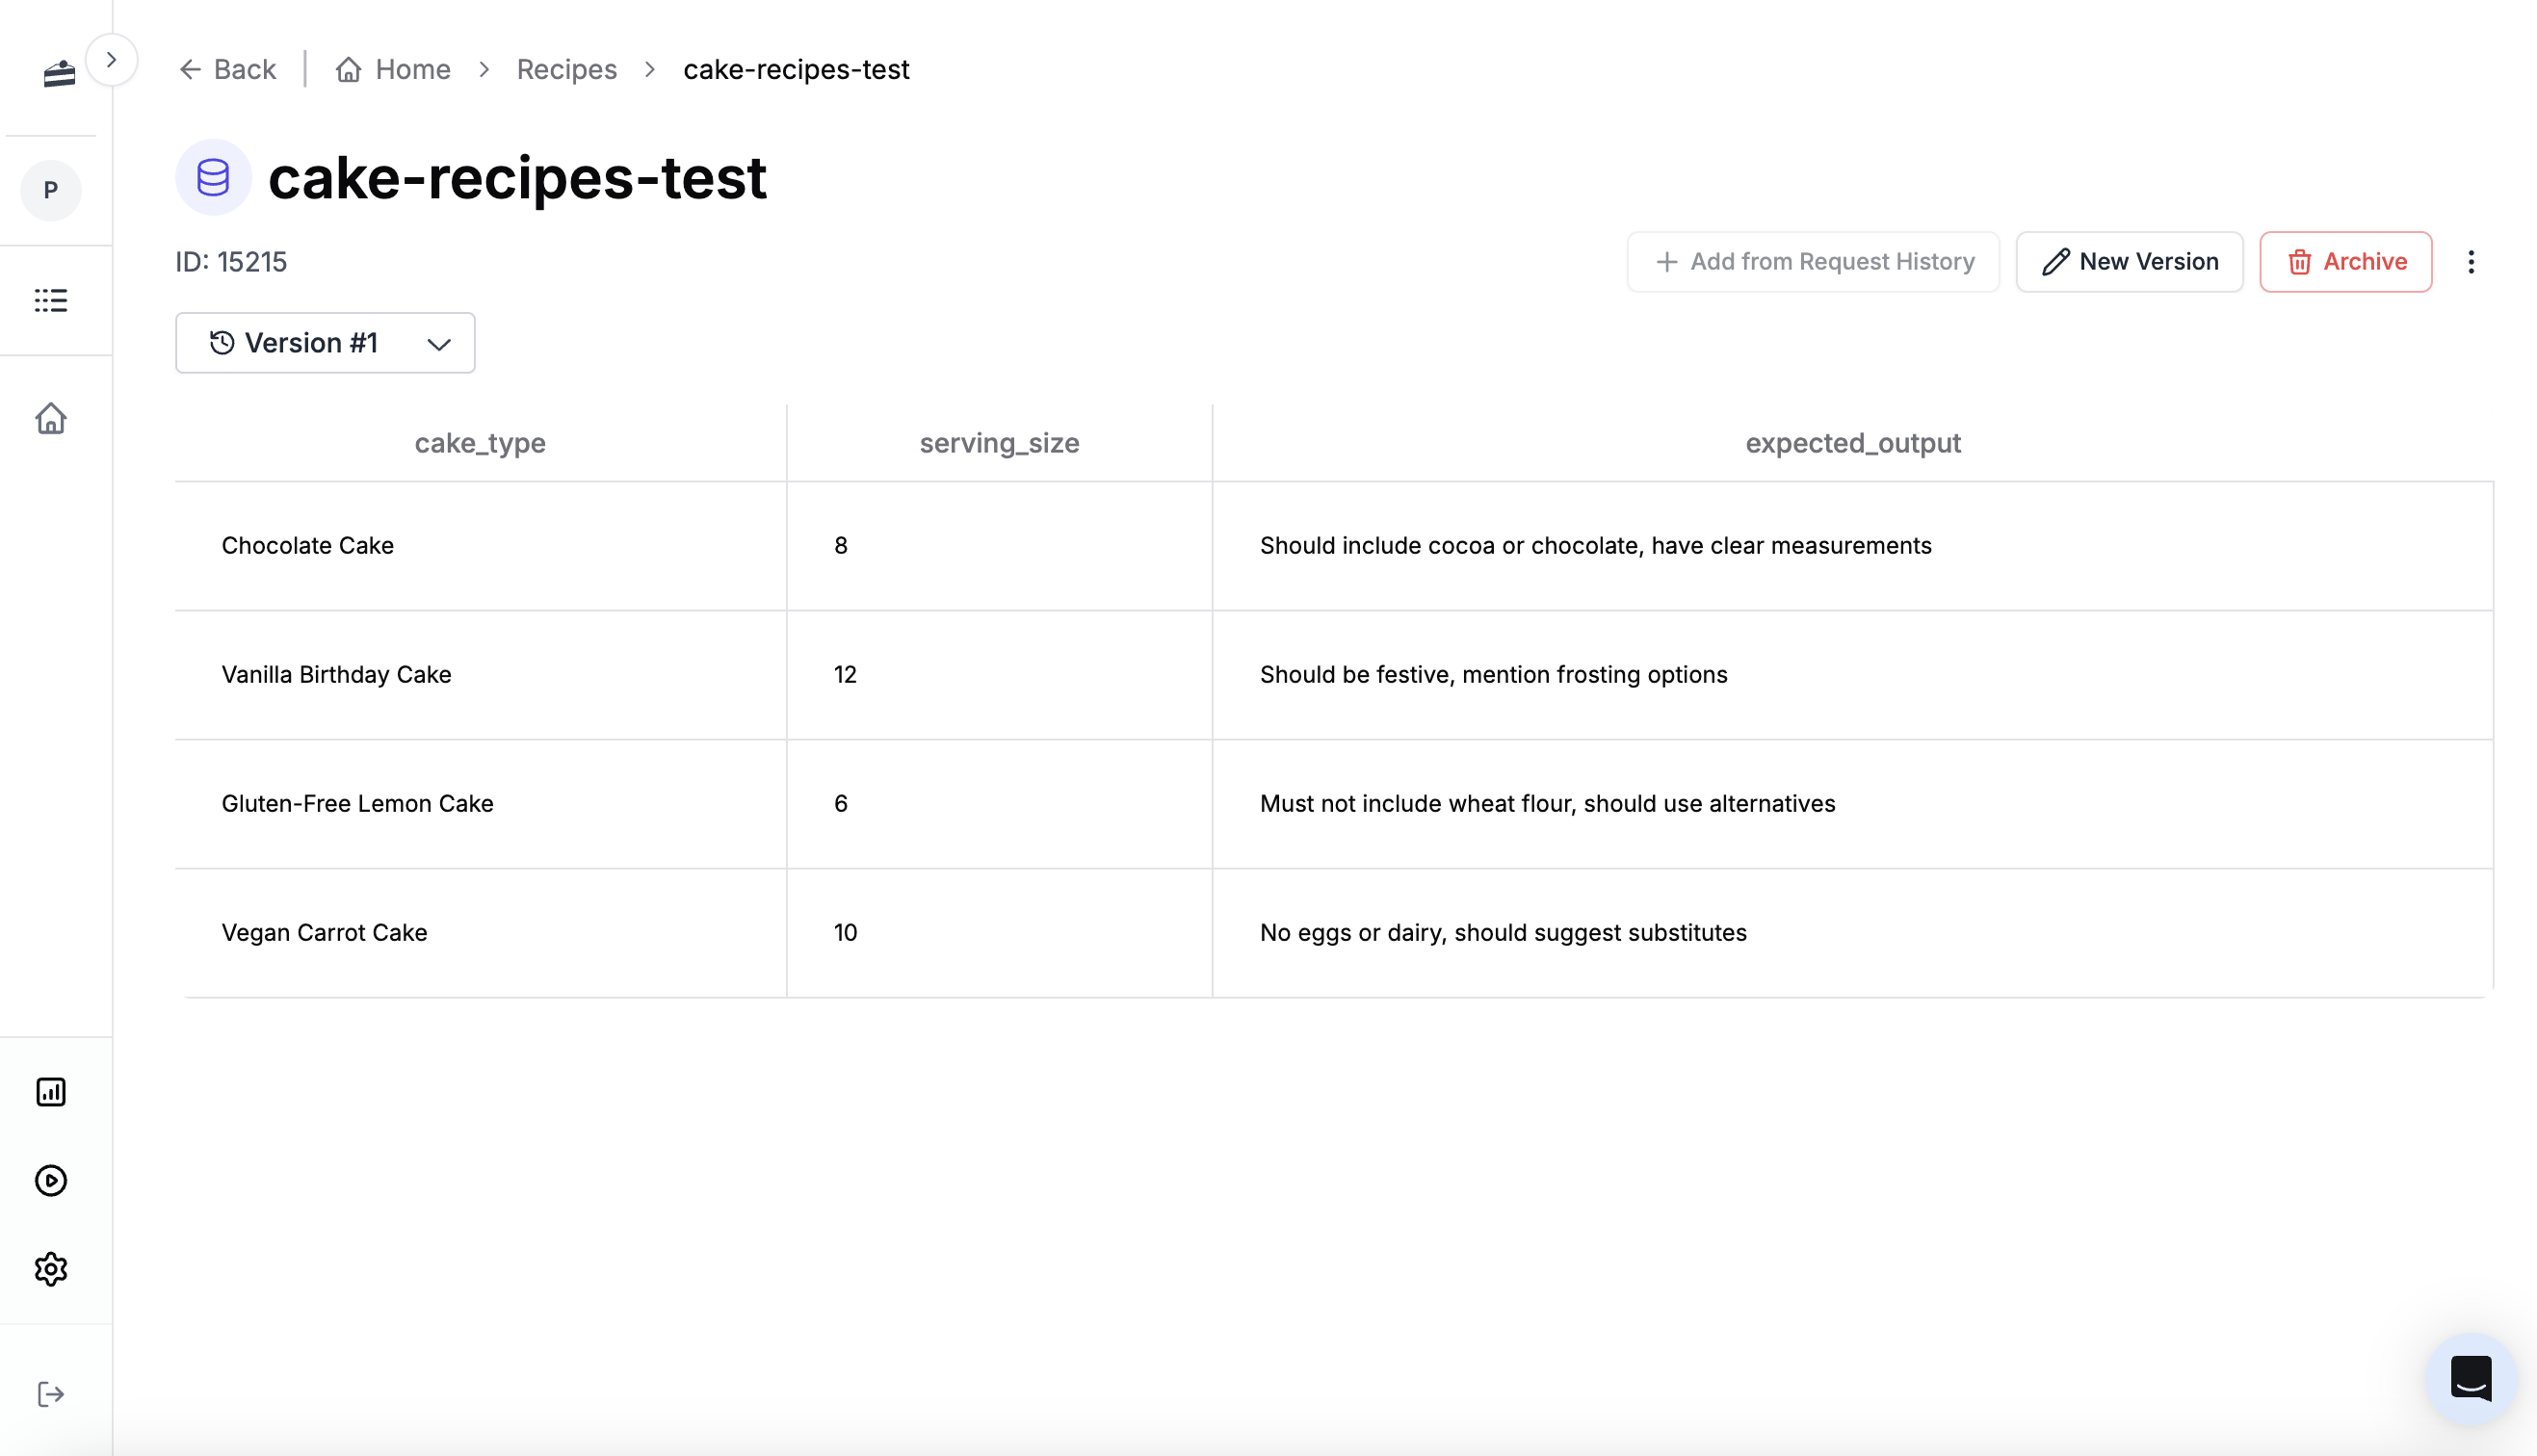 Add a few test cases. Each row needs the input variables your prompt expects, `cake_type` and `serving_size`, plus an optional expected output to compare against.
```csv theme={null}
cake_type,serving_size,expected_output
Chocolate Cake,8,"Should include cocoa or chocolate, have clear measurements"
Vanilla Birthday Cake,12,"Should be festive, mention frosting options"
Gluten-Free Lemon Cake,6,"Must not include wheat flour, should use alternatives"
Vegan Carrot Cake,10,"No eggs or dairy, should suggest substitutes"
```
Download this CSV or add rows manually in the UI.
Learn more about [datasets](/features/evaluations/datasets-overview).
### Create an eval pipeline
Now build a pipeline that runs your prompt against each test case and scores the results.
Click **New** -> **Evaluation** and select your dataset.
First, add a **Prompt Template** column. This runs your prompt against each row in the dataset, using the column values as input variables. The output appears in a new column.
Next, add an **LLM-as-judge** scoring column. This uses AI to score each output against criteria you define. For the recipe prompt, check whether:
* The recipe includes the required sections: Overview, Ingredients, Instructions, and Variations
* Measurements are provided in both metric and US units
* The serving size is correct
Add a few test cases. Each row needs the input variables your prompt expects, `cake_type` and `serving_size`, plus an optional expected output to compare against.
```csv theme={null}
cake_type,serving_size,expected_output
Chocolate Cake,8,"Should include cocoa or chocolate, have clear measurements"
Vanilla Birthday Cake,12,"Should be festive, mention frosting options"
Gluten-Free Lemon Cake,6,"Must not include wheat flour, should use alternatives"
Vegan Carrot Cake,10,"No eggs or dairy, should suggest substitutes"
```
Download this CSV or add rows manually in the UI.
Learn more about [datasets](/features/evaluations/datasets-overview).
### Create an eval pipeline
Now build a pipeline that runs your prompt against each test case and scores the results.
Click **New** -> **Evaluation** and select your dataset.
First, add a **Prompt Template** column. This runs your prompt against each row in the dataset, using the column values as input variables. The output appears in a new column.
Next, add an **LLM-as-judge** scoring column. This uses AI to score each output against criteria you define. For the recipe prompt, check whether:
* The recipe includes the required sections: Overview, Ingredients, Instructions, and Variations
* Measurements are provided in both metric and US units
* The serving size is correct
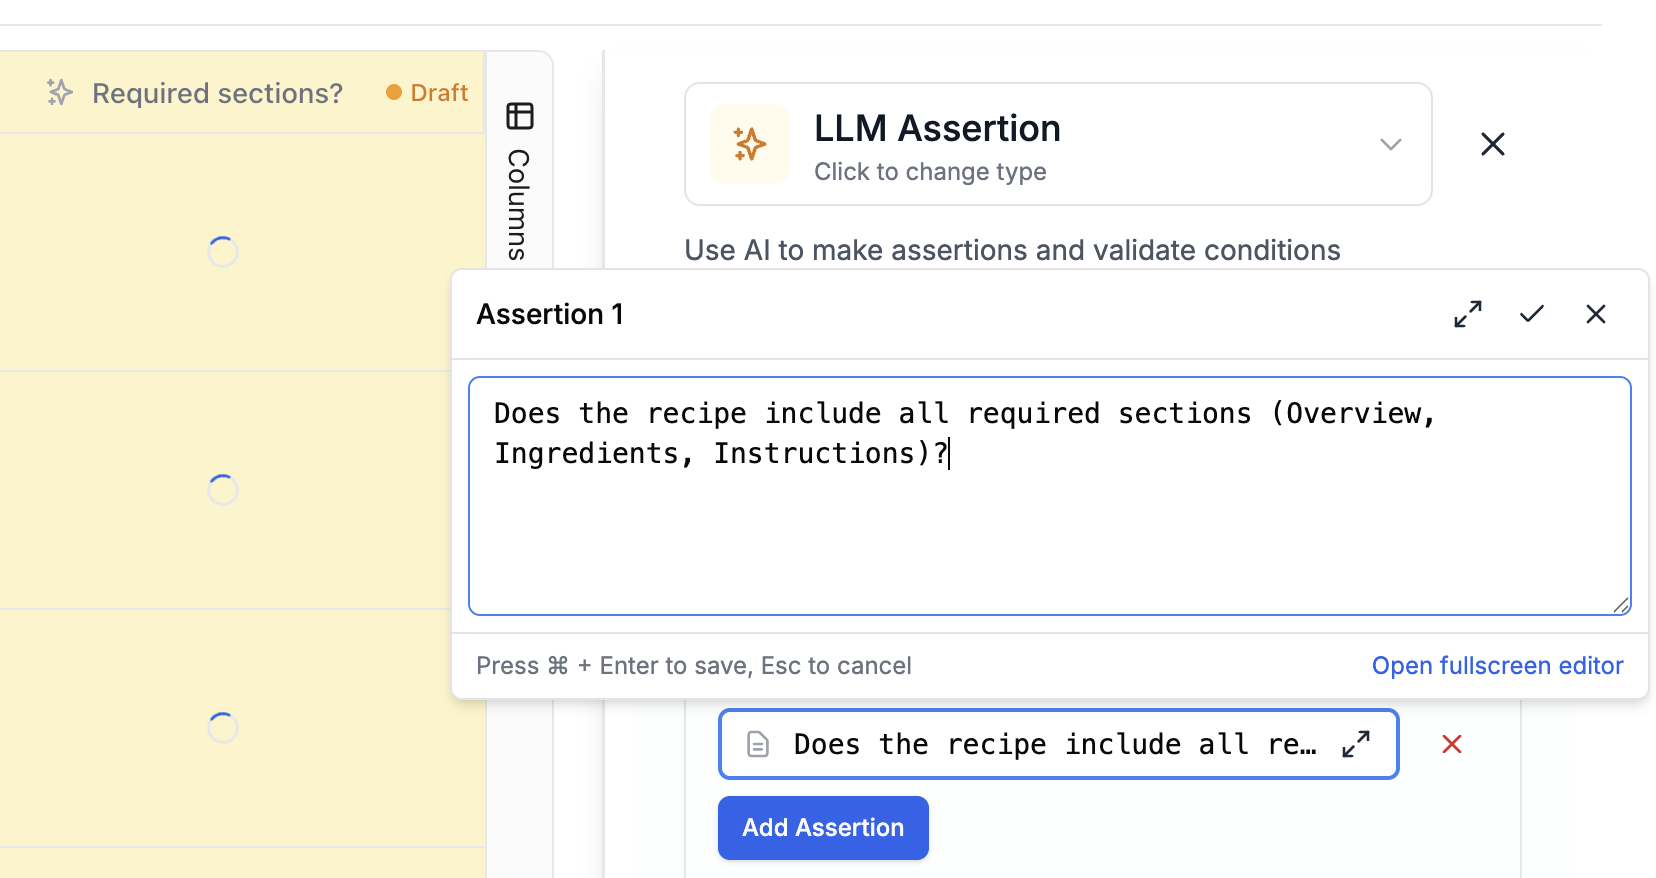 You can also add an **Equality Comparison** column to compare the prompt output against the `expected_output` column in your dataset.
 Run the evaluation to see scores across all test cases. Learn more about [evaluations](/features/evaluations/overview).
Beyond LLM-as-judge, PromptLayer supports:
* **Human grading**: Collect scores from domain experts
* **Equality Comparison**: Compare outputs to expected results
* **Cosine similarity**: Measure semantic similarity between outputs
* **Code evaluators**: Write custom Python scoring functions
Workflow nodes work the same way in eval pipelines.
### CI/CD evaluations
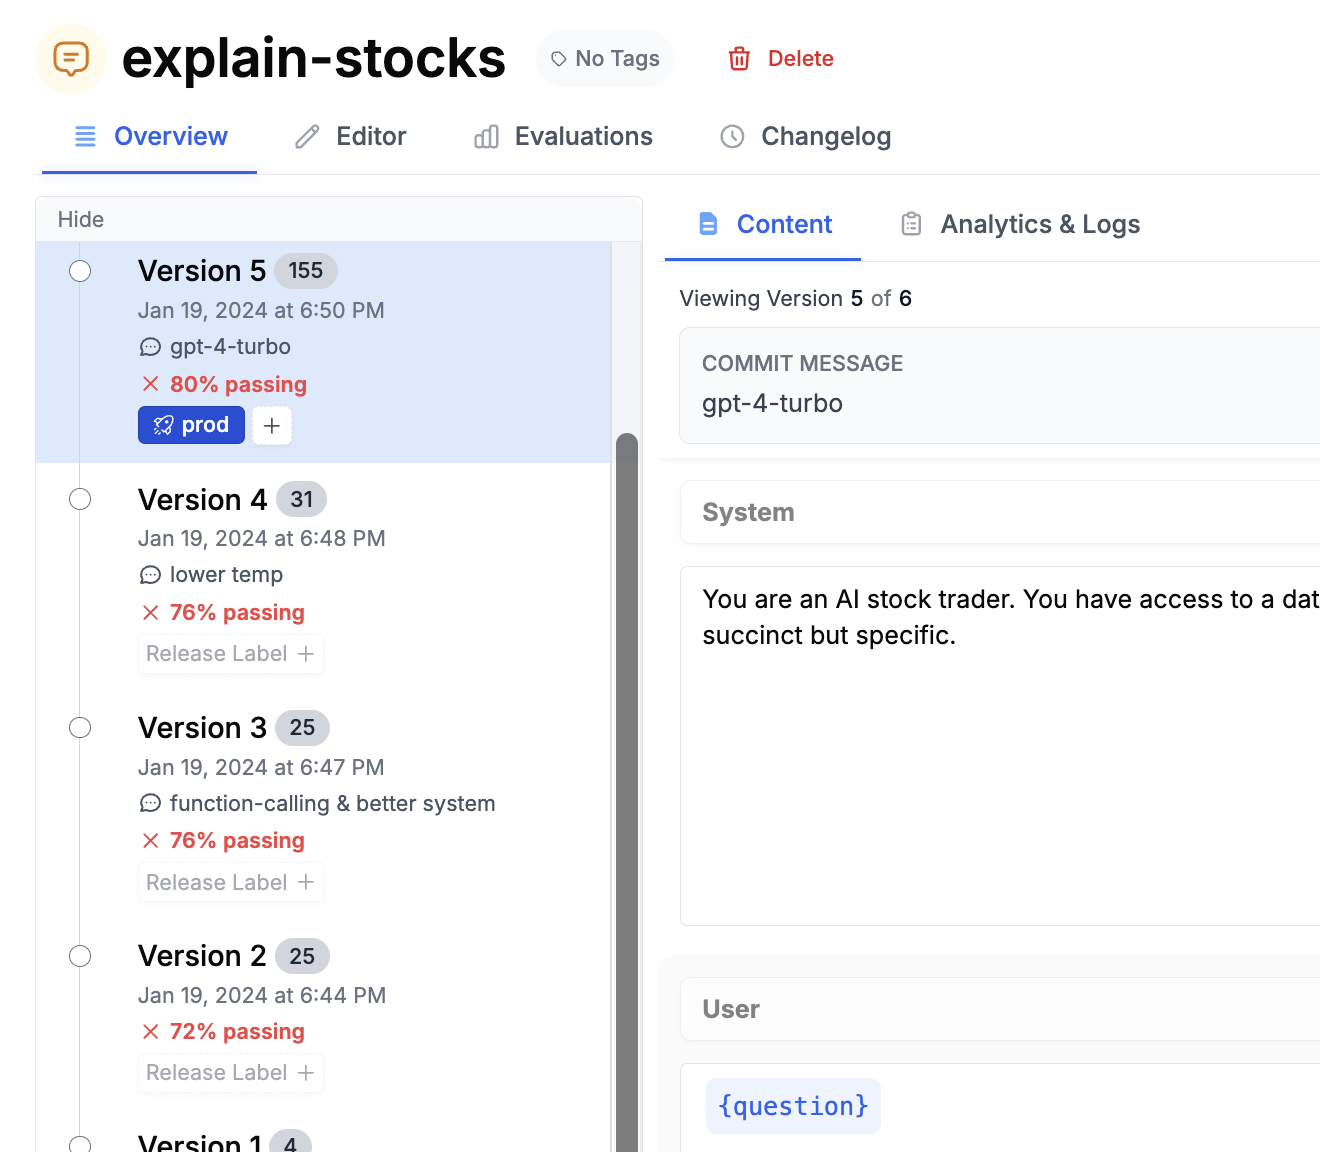
Attach an evaluation pipeline to run automatically every time you save a new prompt version, similar to GitHub Actions running tests on each commit.
When saving a prompt, the commit dialog lets you select an evaluation pipeline. Choose one and click **Next**.
From then on, each new version you create will run through the eval and show its score in the version history. This makes it easier to spot regressions before they reach production.
Run the evaluation to see scores across all test cases. Learn more about [evaluations](/features/evaluations/overview).
Beyond LLM-as-judge, PromptLayer supports:
* **Human grading**: Collect scores from domain experts
* **Equality Comparison**: Compare outputs to expected results
* **Cosine similarity**: Measure semantic similarity between outputs
* **Code evaluators**: Write custom Python scoring functions
Workflow nodes work the same way in eval pipelines.
### CI/CD evaluations
Attach an evaluation pipeline to run automatically every time you save a new prompt version, similar to GitHub Actions running tests on each commit.
When saving a prompt, the commit dialog lets you select an evaluation pipeline. Choose one and click **Next**.
From then on, each new version you create will run through the eval and show its score in the version history. This makes it easier to spot regressions before they reach production.
 Learn more about [continuous integration](/features/evaluations/continuous-integration).
## Learn more
* [Release Labels](/features/prompt-registry/release-labels) - Deploy the right prompt version without code changes
* [Evaluations](/features/evaluations/overview) - Learn how evaluation pipelines work
* [Deployment strategies](/onboarding-guides/deployment-strategies) - Choose a production integration pattern
Learn more about [continuous integration](/features/evaluations/continuous-integration).
## Learn more
* [Release Labels](/features/prompt-registry/release-labels) - Deploy the right prompt version without code changes
* [Evaluations](/features/evaluations/overview) - Learn how evaluation pipelines work
* [Deployment strategies](/onboarding-guides/deployment-strategies) - Choose a production integration pattern